The Final Layer
When I first decided to build the facade from foam, I expected to finish it with fiberglass.
I could already imagine the experience: trouncing around the basement in a Tyvek suit, sweating my guts out, applying fiberglass resin over an enormous doorway and then spending countless hours sanding it into the correct shape.
It did not sound fun.
Somewhere along the way (possibly while reading a post at The RPF), I discovered StyroSpray 1000. I don’t remember exactly where I found it. I had never used it before, and I did not personally know anyone who had.
Still, it appeared to solve the problem.
Bare insulating foam is remarkably easy to damage. A small bump can leave a permanent dent. That might be acceptable for a display piece sitting safely on a shelf, but this facade surrounds the entrance to my workshop. People would brush against it, press its buttons and generally treat it like a door.
Because it is a door.
I needed a durable shell that would preserve the shape beneath it without requiring me to fiberglass the entire structure.
StyroSpray 1000 seemed worth trying.
Preparing the Surface
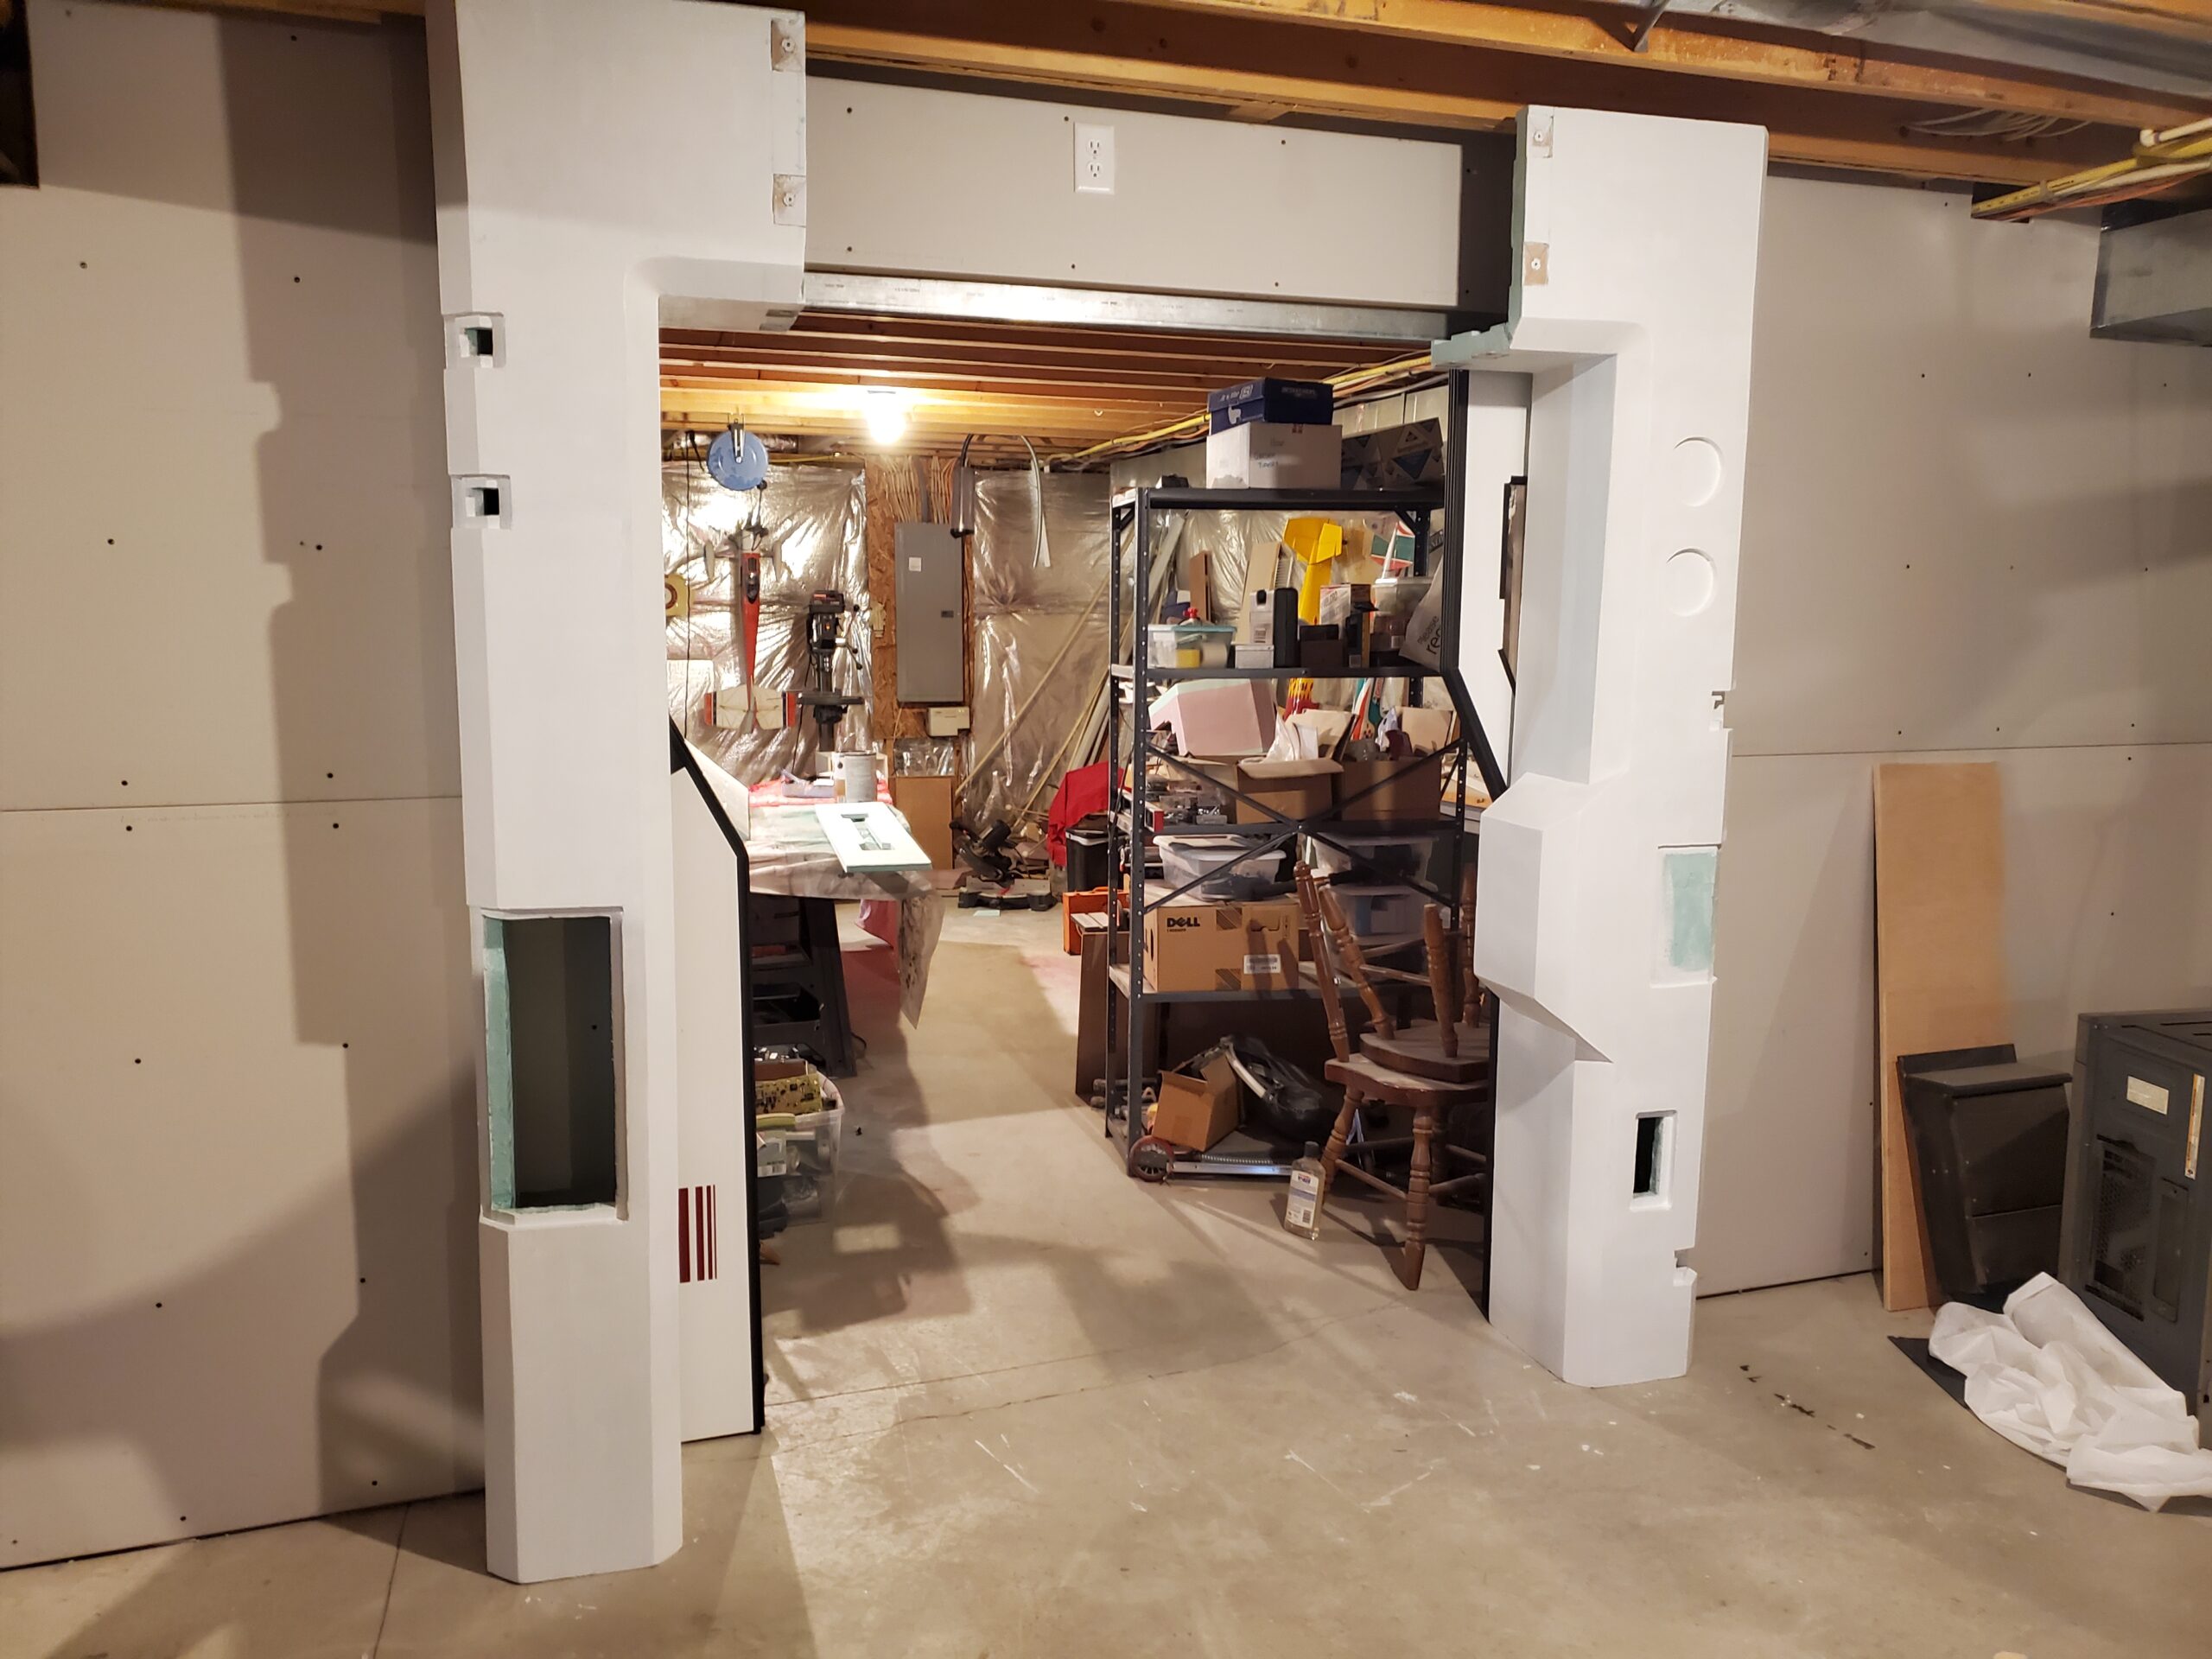
Before applying the hard coating, I filled the seams, gaps and transitions with drywall compound. This was especially important where separate pieces of foam met or where I had added scraps to create more complicated shapes.
The drywall mud also helped soften the transitions around the bump-out, the control panel and the compound curves near the upper bulkhead. Once everything dried, I sanded the facade until the surfaces flowed together as cleanly as I could manage.
Then I applied StyroPrime, the primer intended for use beneath StyroSpray.
After the primer dried, it was time for the hard shell.
Rolling Instead of Spraying
As the name suggests, StyroSpray is ideally sprayed onto the surface. According to its technical data, it is a two-component hard coating that can be sprayed, brushed or applied with a foam roller.
Spraying would likely have produced the smoothest result. It also required equipment and respiratory protection that I did not own.
Fortunately, rolling was an option.
StyroSpray consists of two liquid components that must be carefully measured and thoroughly mixed. Once combined, the material has a consistency similar to very thick paint. It can be rolled, but it requires patience.
I applied three coats using foam rollers.
The product did not cure immediately inside a sealed container, so I could bag the remaining mixture between applications and return to it for the second and third coats. That made the process much more manageable than mixing a fresh batch for every section.
The roller left small bubbles in the finish. Once everything cured, I sanded those imperfections away before painting.
This was still considerably better than my original vision of living inside a Tyvek suit while sanding an entire doorway covered in fiberglass.
A Hard Shell
The difference between coated and uncoated foam was dramatic.
Bare foam dents if you look at it too aggressively. The coated surface still has a slight amount of give, but ordinary contact no longer leaves a mark or deforms the facade.
That was exactly what I needed.
The coating also unified the different construction materials. The facade included foam, hardboard, drywall compound, wood reinforcement and 3D-printed components. After coating, sanding and painting, those transitions largely disappeared.
The control panel no longer looked like a sheet of hardboard inserted into a foam box. It looked like part of a single manufactured structure.
At least, a structure manufactured by someone with a questionable understanding of future architecture.
Painting the Pillars
The color scheme generally followed the original Stertman rendering: white as the primary color with a dark blue band running across the middle of the vertical structures.
I began by painting the entire facade white using Krylon spray paint.
Then I masked the pillars with painter’s tape and large sheets of paper, leaving only the middle band exposed. The masking worked surprisingly well, and the blue created the strong horizontal break I wanted.
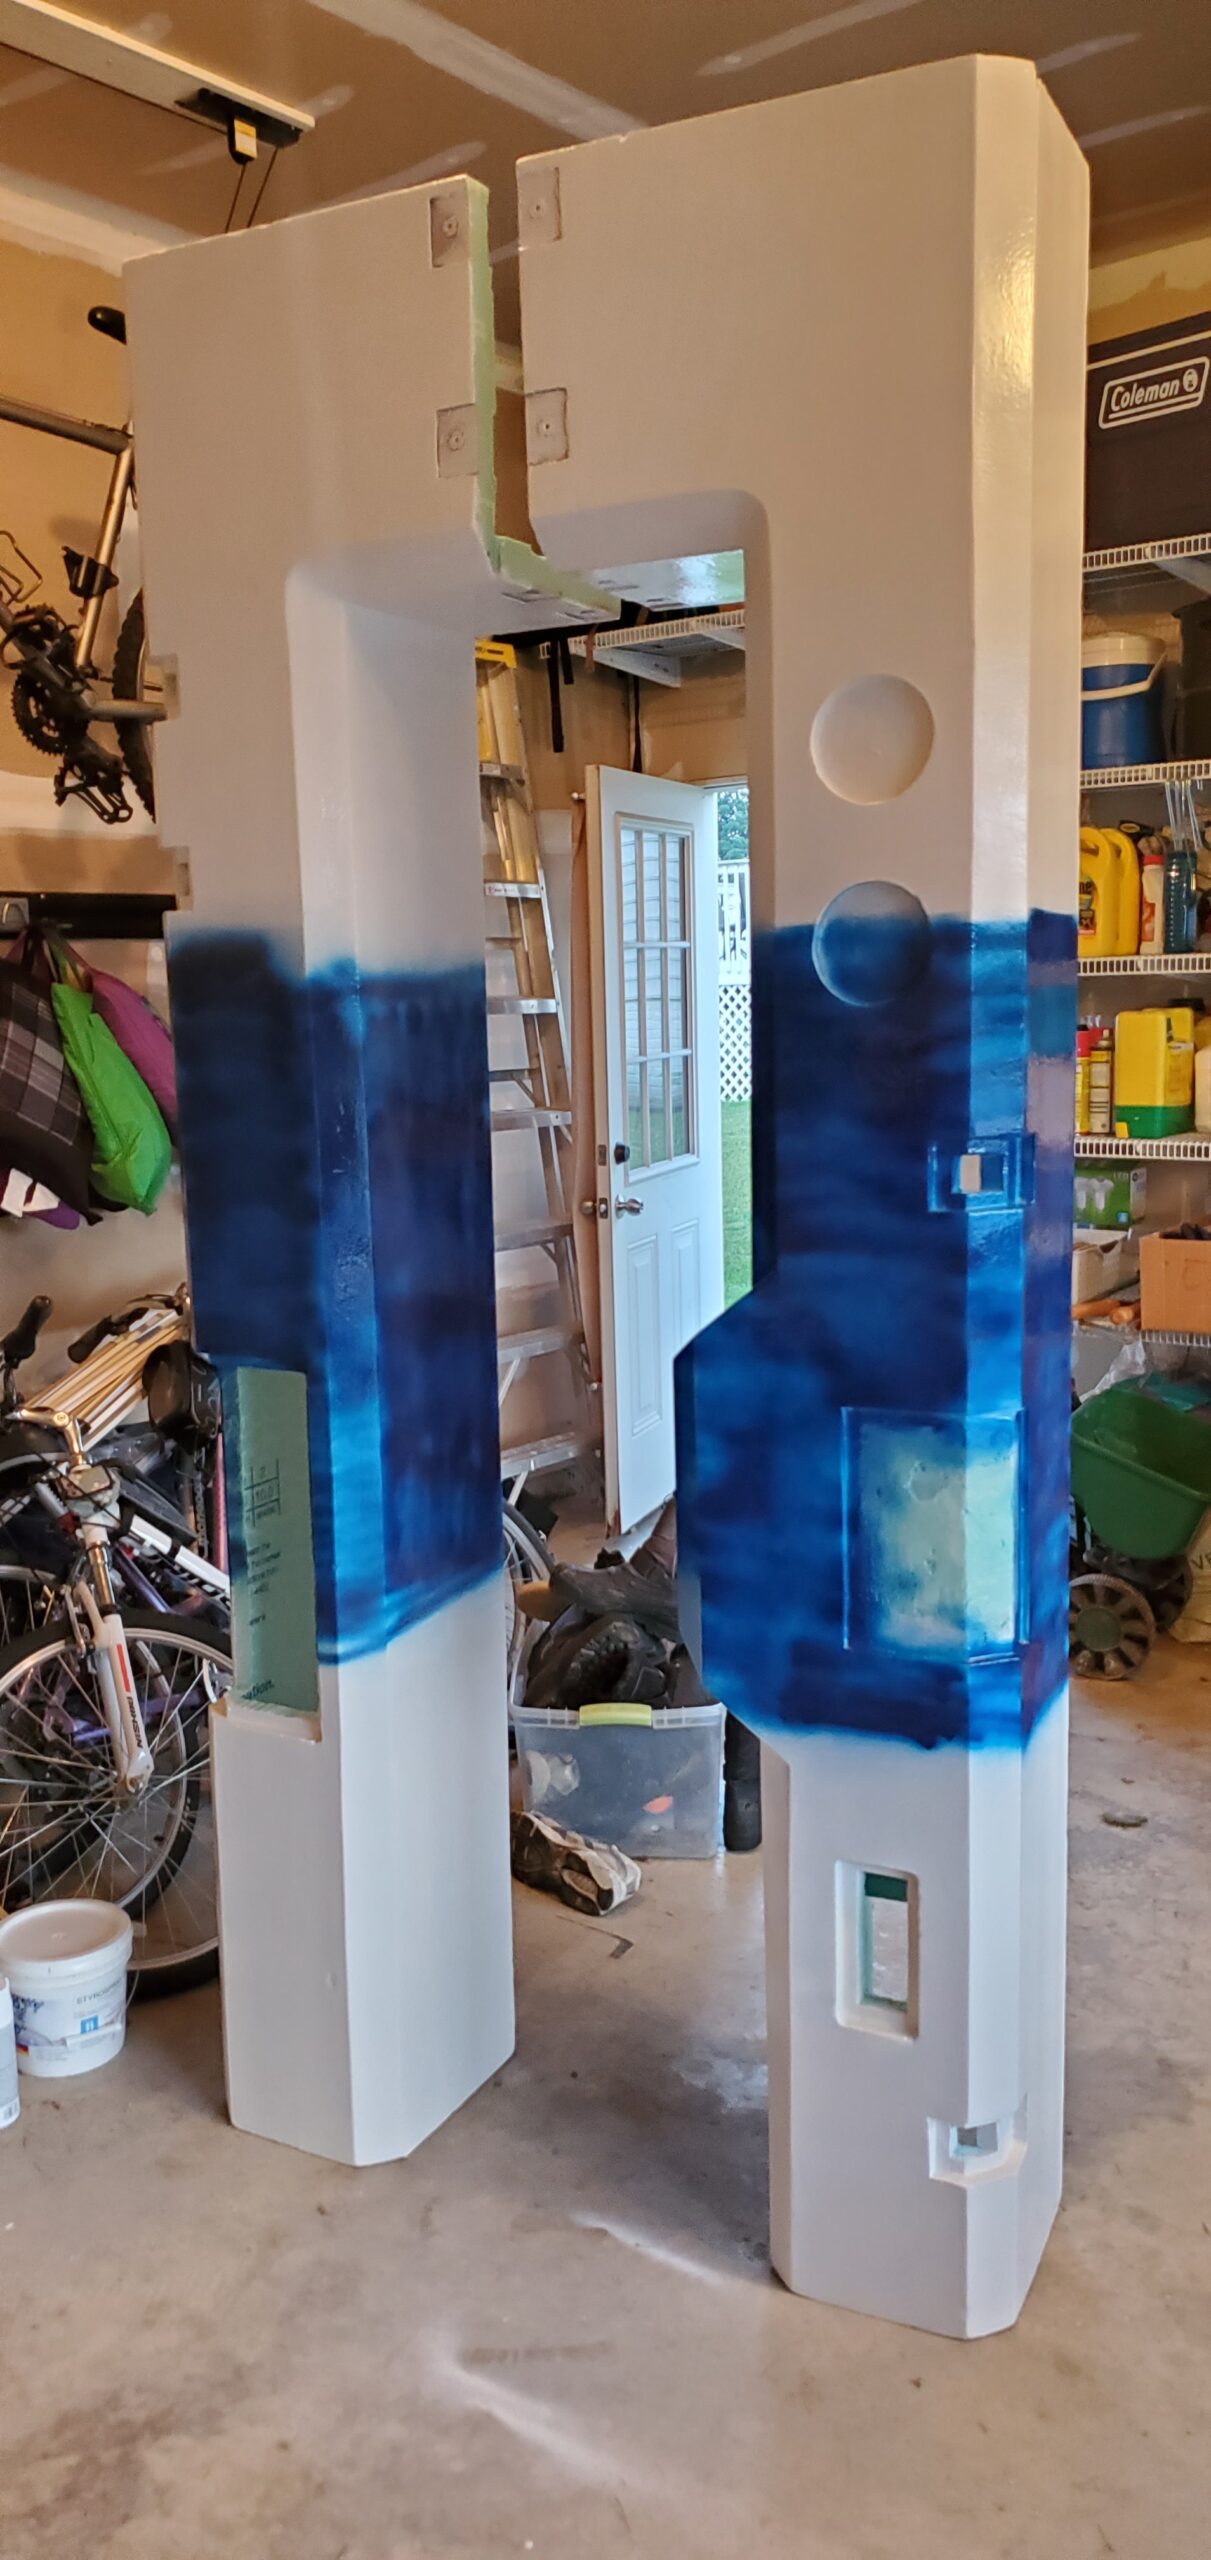
There is one faint arc of blue overspray near the top where I did not protect the white surface quite well enough.
It is still there.
You probably would not notice it unless I pointed it out. Now that I have pointed it out, you will be able to find it immediately.
You’re welcome.
Making Foam Look Like Metal
The upper bulkhead needed a different finish. I wanted it to look like a heavy piece of metal spanning the doorway—not a carefully carved stack of insulating foam.
I started with a gray base coat. Then I added purple and blue highlights before lightly layering silver paint over everything.
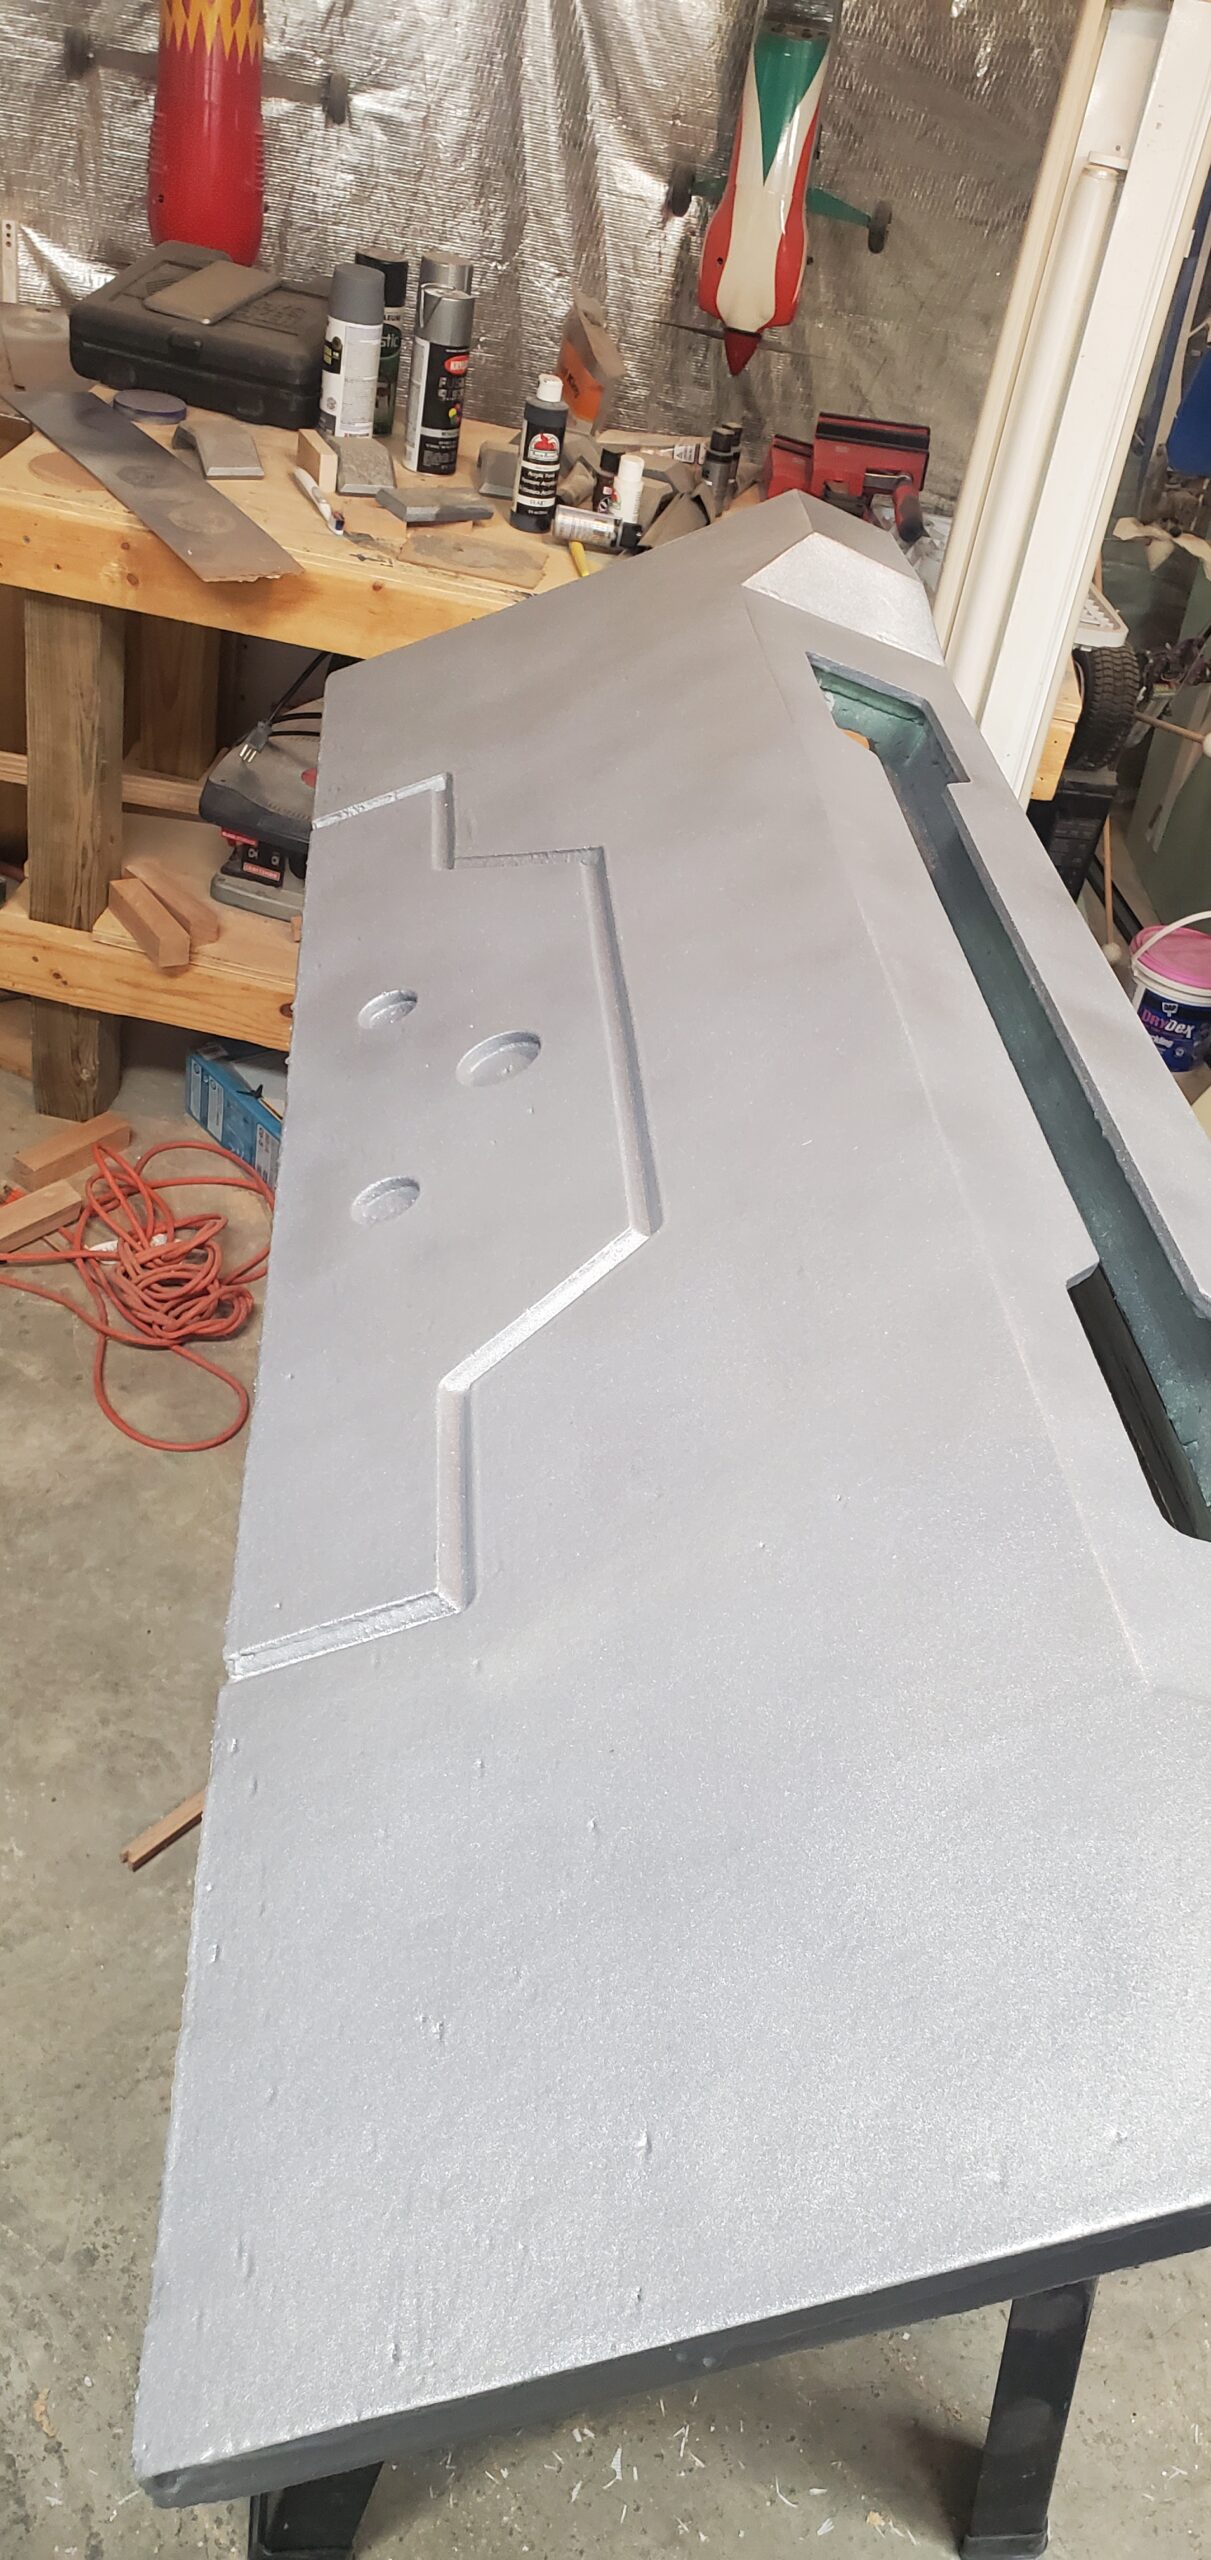
The different colors created depth beneath the metallic surface. Instead of appearing as one flat coat of silver paint, the highlights suggested changes in the metal and variations in how it reflected light.
The foam was not perfectly smooth, even after filling, coating and sanding. In this case, that worked in my favor. The slightly rough surface suggested lightly pitted or cast metal.
It is remarkable what a little silver paint can convince the eye to believe.
Buckling Things Down
Several smaller decorative pieces still needed to be mounted after painting. These included the corner “buckles” positioned around the facade.
I had not developed an elaborate mounting system for them. Eventually, I glued small wooden blocks to their backs and cut matching openings in the foam. The blocks simply slide into the facade.
It worked like a charm.
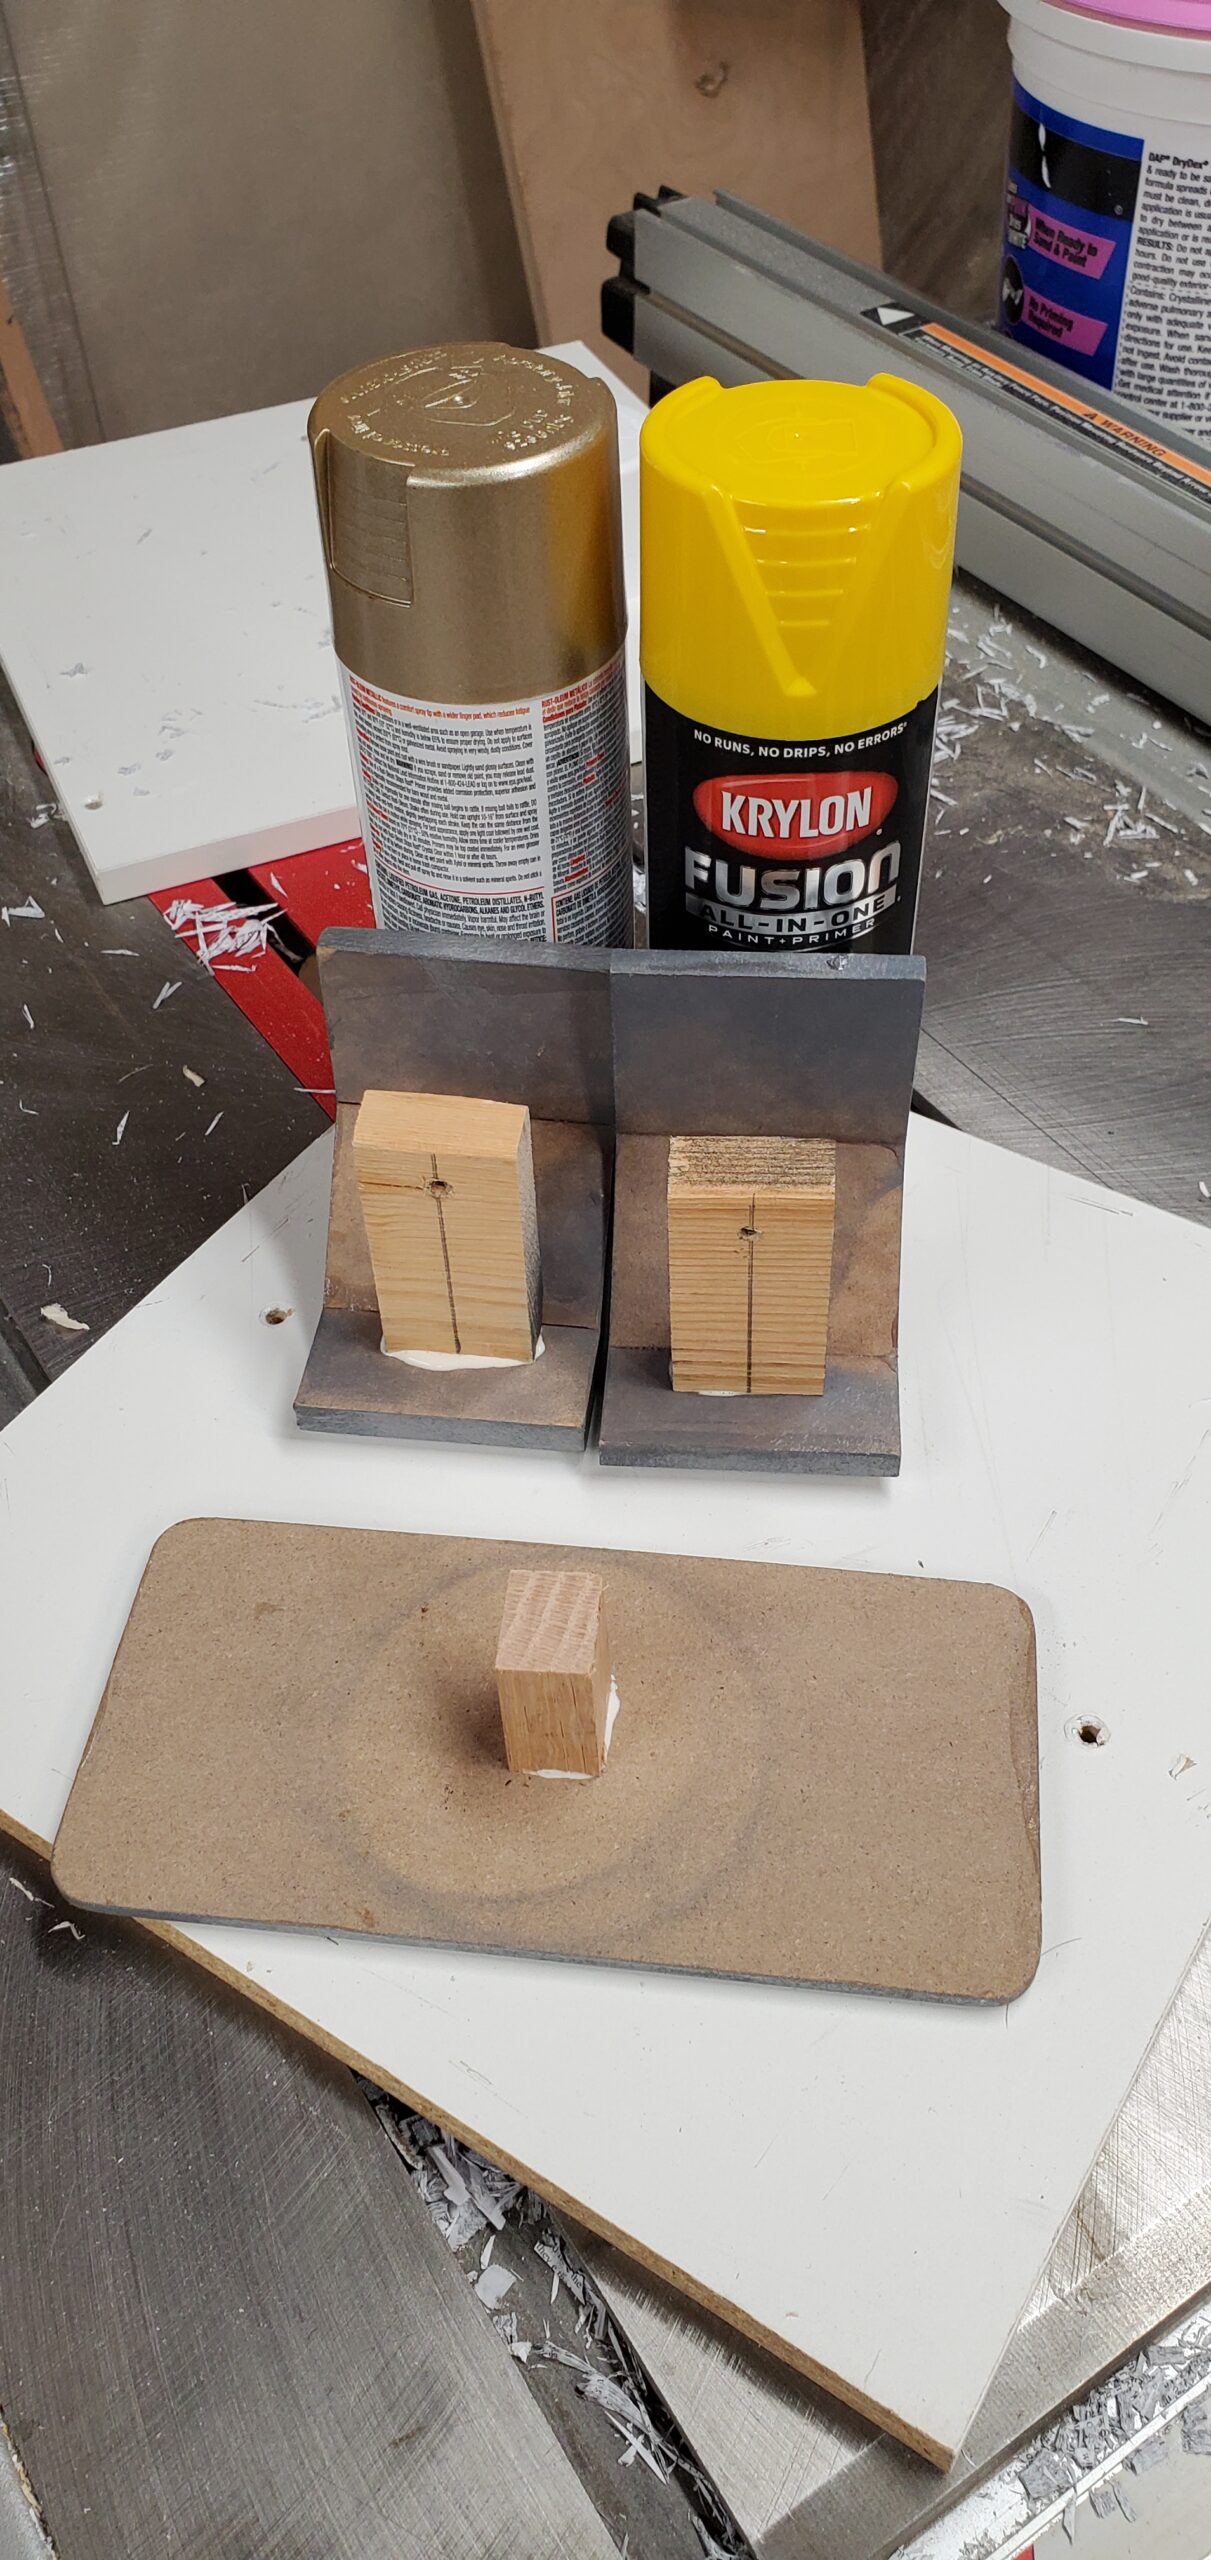
The larger plate used a wooden toggle on the back to lock it in place. It did not necessarily need to remain removable; I probably could have glued it permanently.
I simply did not think about that at the time.
Given how useful removable components became elsewhere in the project, accidental serviceability is not the worst outcome.
Setting the Scene
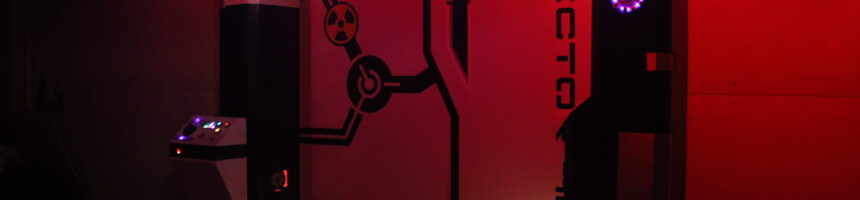
Once the facade was painted, assembled and illuminated, I wanted a photograph that captured how it felt in my imagination.
I placed colored theatrical gels over ordinary floodlights and added smoke from a fog machine. The red and blue lighting caught the edges of the facade, illuminated the haze and made the glowing components stand out against the darkness.
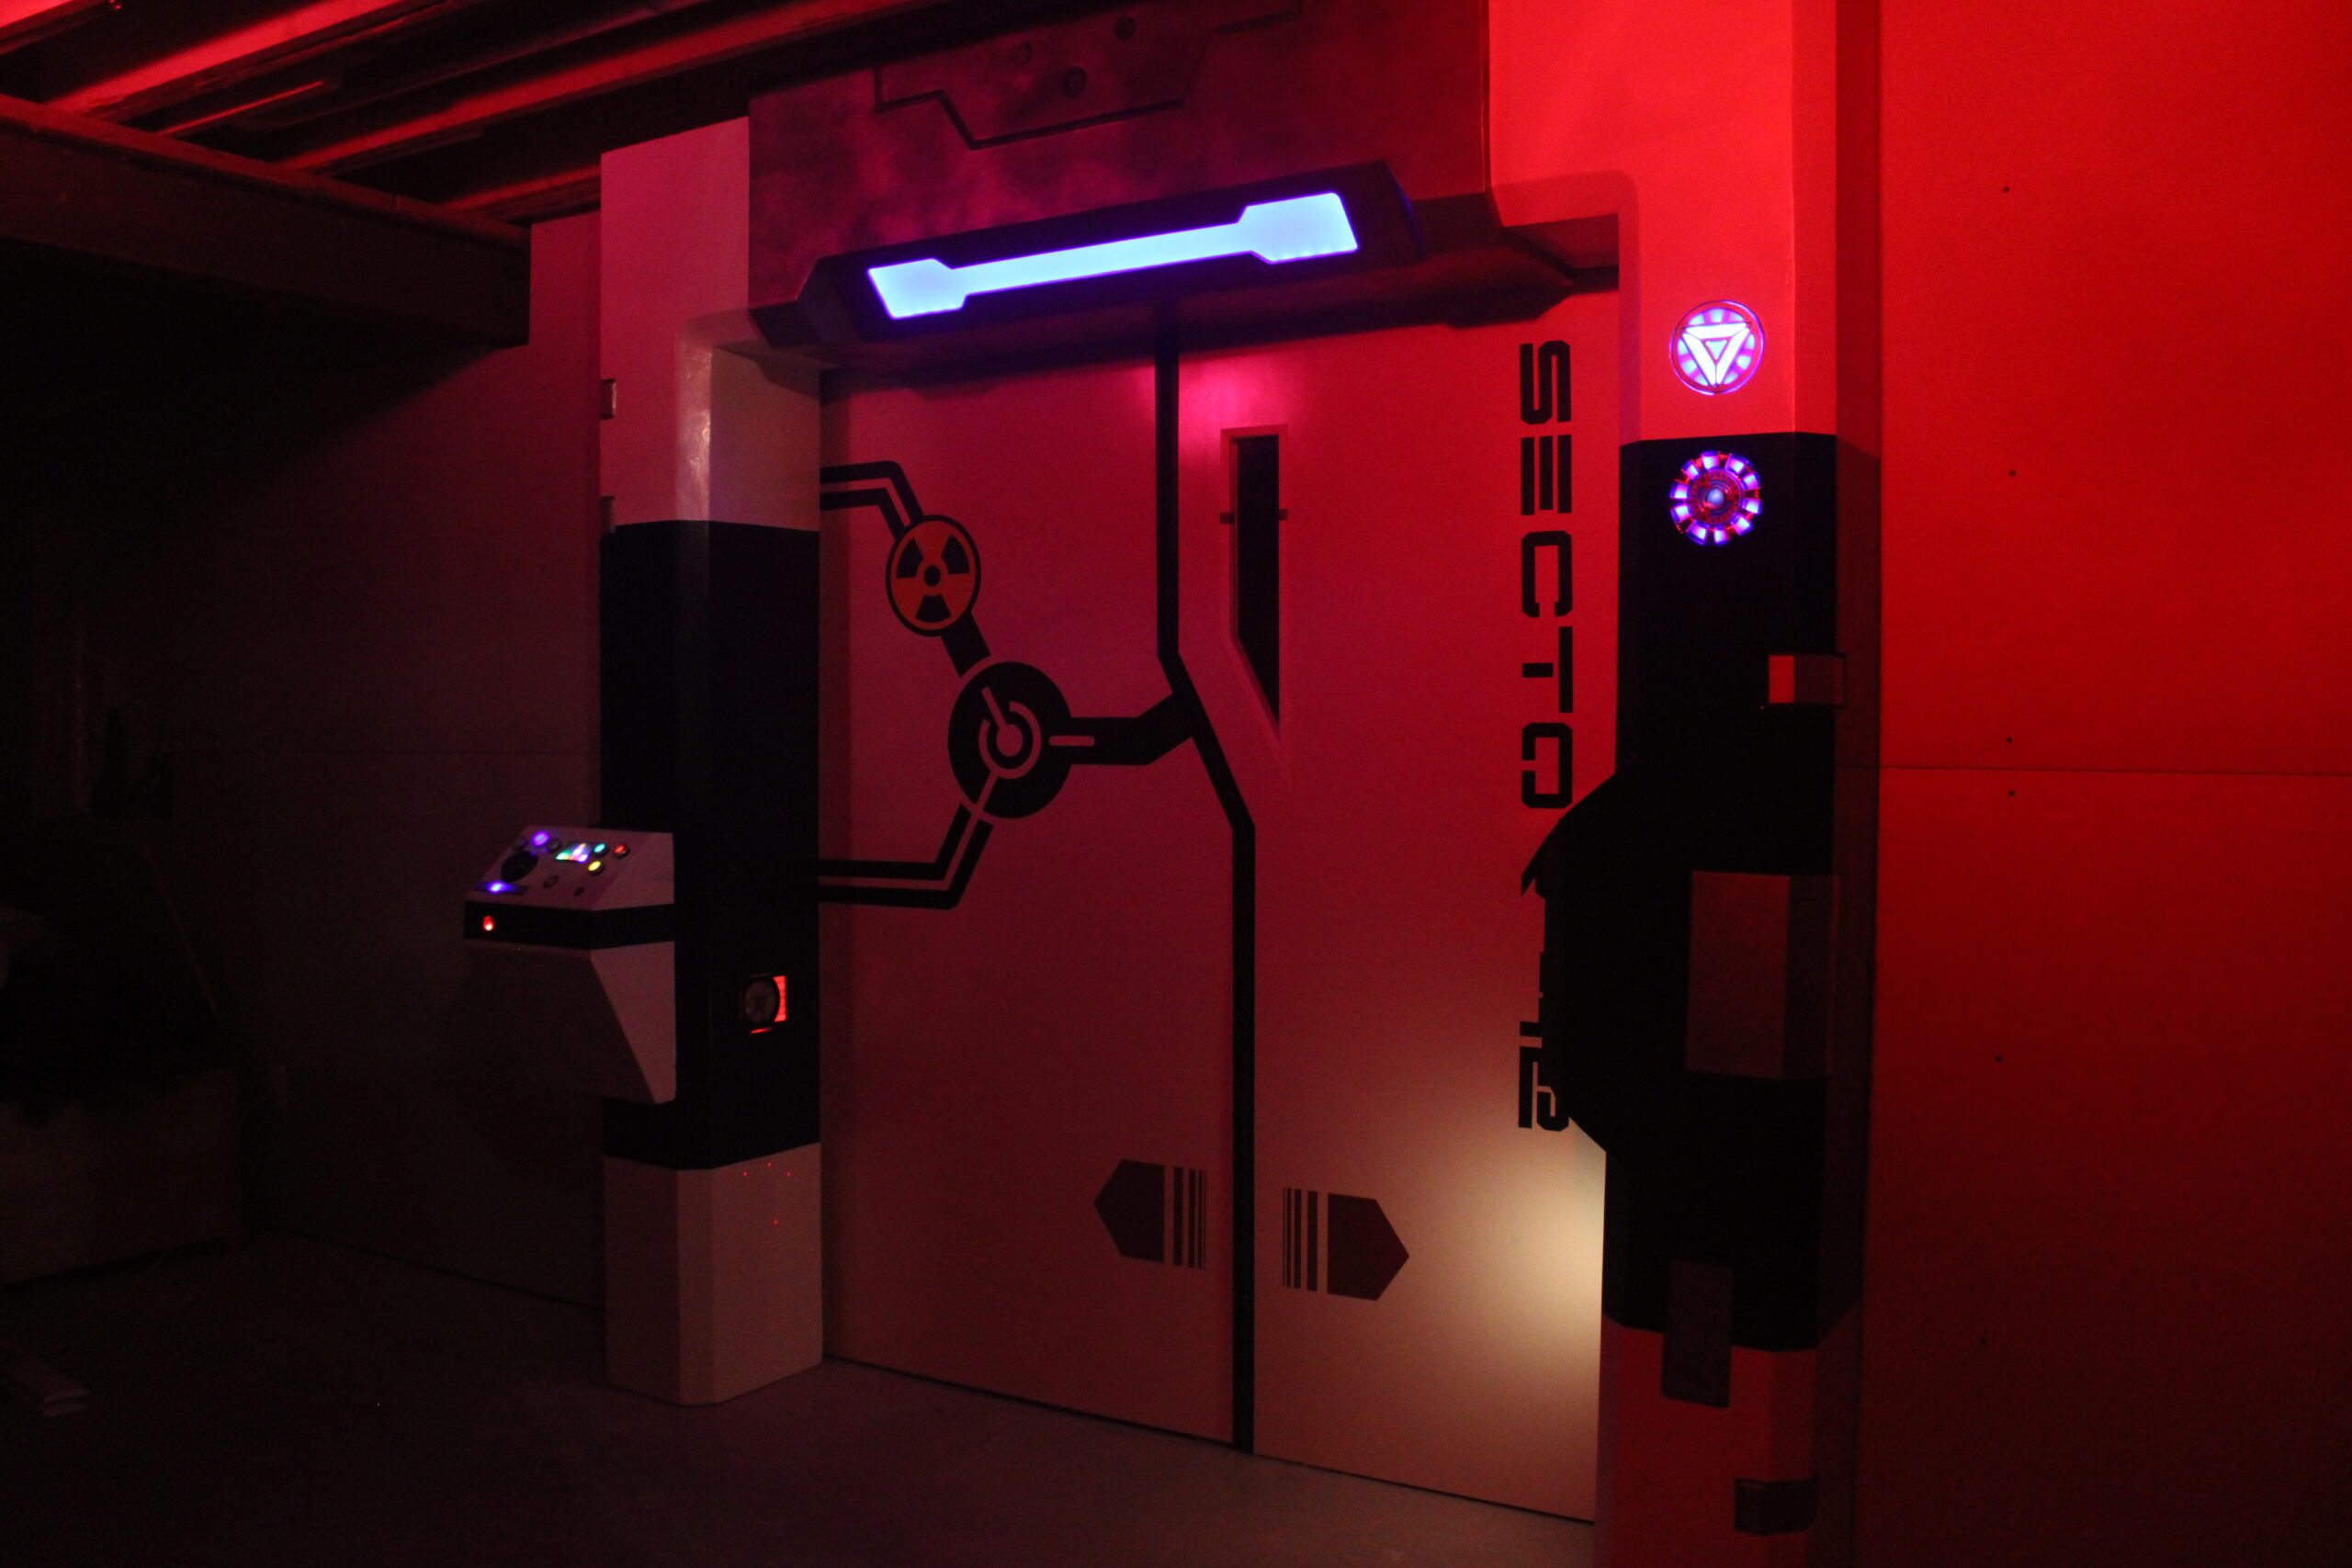
For a few moments, the basement disappeared.
The unfinished walls, exposed ceiling and workshop clutter faded into the shadows. What remained was an airlock glowing in the dark, waiting to open onto some other world.
That photograph was staged, but the reaction people have to the door is real.
Please Touch
I have watched grown men revert to little boys when they see the airlock.
There is a moment of disbelief, followed by curiosity, followed by the overwhelming need to start pressing buttons.
Parents frequently react in the opposite direction. Their children move toward the control panel, and the warning comes immediately:
“No, don’t touch that!”
Ha!
It was made to be touched.
It was built to be played with. The buttons are supposed to be pressed. The lights are supposed to blink. The doors are supposed to move. The whole thing exists to inspire imagination and invite people to engage with it.
My eldest daughter once told some of her friends about “the door.” When I eventually met them, they reacted as though I were some kind of celebrity.
It was really weird.
I am just a guy who built a door.
Is It Finished?
Nothing significant has changed for the last couple of years, so I think it is fair to call the airlock complete.
That does not mean I have run out of ideas.
I still want to give the airlock lever a function. There are a couple of small software bugs to fix. The motor control should handle direction reversals more gracefully; I managed to break the door once by reversing it while it was moving.
I should also add some form of obstruction detection to recognize an unsafe condition while the doors are closing.
So, yes, it is finished.
Mostly.
Projects like this do not always reach a point where no additional work is possible. Sometimes “finished” simply means that the original idea has been realized and the remaining changes are improvements rather than requirements.
Seven Years Later
This project took approximately seven years.
During those years, I was working, raising children and handling all the ordinary responsibilities that make it difficult to disappear into a workshop for months at a time. The airlock sometimes sat untouched while life happened around it.
Then I returned and solved the next problem.
That became part of what I wanted my children to learn from the project. You do not need to know every answer before you begin. You can learn new skills, change the design, cut apart something that felt finished and build it again. You can set a project aside when life requires your attention and still return to it later.
Progress does not have to be fast to be real.
But there is one more lesson I hope they (and anyone reading this series) carry with them:
Go build something weird.
It is okay to make something that reflects your style, even if no one else would make the same choices. It is okay to ignore the practical barn doors and build a science-fiction airlock instead.
The barn doors would have worked. They would have opened and closed. They would have blocked dust from entering the rest of the basement. They would have been … stylish.
No one would have given them a second look.
This door makes people stop. It makes them smile. It inspires questions, curiosity and wonder. It invites people to imagine that there might be something extraordinary waiting on the other side.
The door is a story.
That is what happens when we allow ourselves to be unique.
You do not need permission.
Go build something weird.
Recent Comments