Seven Years in the Making
There is a dangerous moment in every project when it begins to look finished.
It isn’t finished, of course. It may not even be close. But it looks enough like the thing in your imagination that cutting it apart suddenly feels wrong.
This project had several of those moments.
The entire science-fiction airlock took about seven years to complete. That sounds like an absurdly long time (and maybe it was) but I was also busy being a dad. In some ways, the long timeline became part of the project’s purpose. I wanted my children to see that worthwhile projects do not have to be completed in a weekend. You can put something down, come back to it, solve another problem, and keep moving forward.
You also do not need to know all the answers before you begin.
That philosophy is either inspirational or a convenient excuse for designing things as I built them. Probably both.
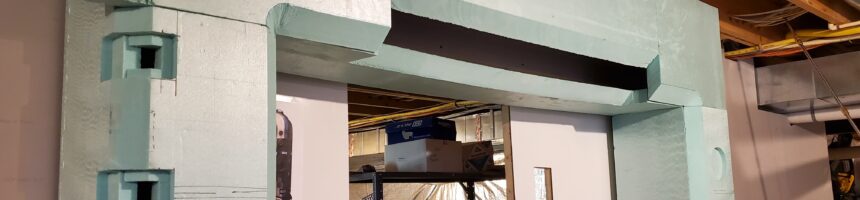
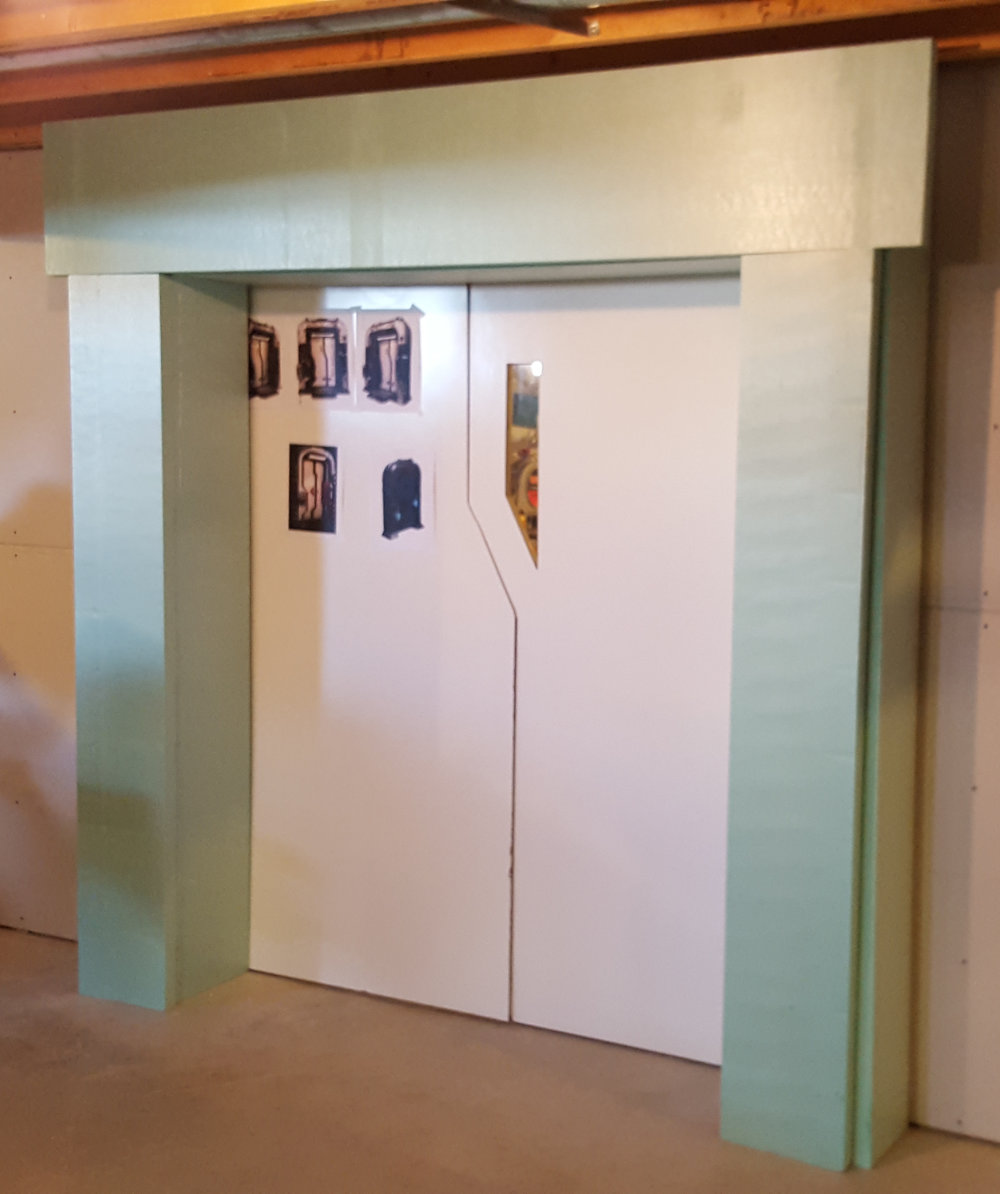
In the previous post, I constructed the basic foam facade around the door. At that point, it was little more than a large rectangular frame. It established the size and shape of the opening, but it did not yet look like a science-fiction airlock.
It was time to start adding some dimension.
Things That Go Bump-Out in the Night
One of the prominent features in the original Stertman rendering was a large bump-out on the right side of the airlock. I wasn’t entirely sure what it was supposed to do, but that describes many of the best parts of science-fiction architecture.
Whatever its imaginary purpose, it helped break up the otherwise flat surface and gave the facade a much more substantial appearance. I wanted to preserve it.
I began by gluing together two layers of two-inch insulating foam using expanding Gorilla Glue. Once the glue cured, I marked the approximate shape directly on the foam. Like most of this facade, the dimensions were developed largely by eye. I studied the original rendering, made my best estimate, and started cutting.
[Insert the two photos showing the bump-out being formed]
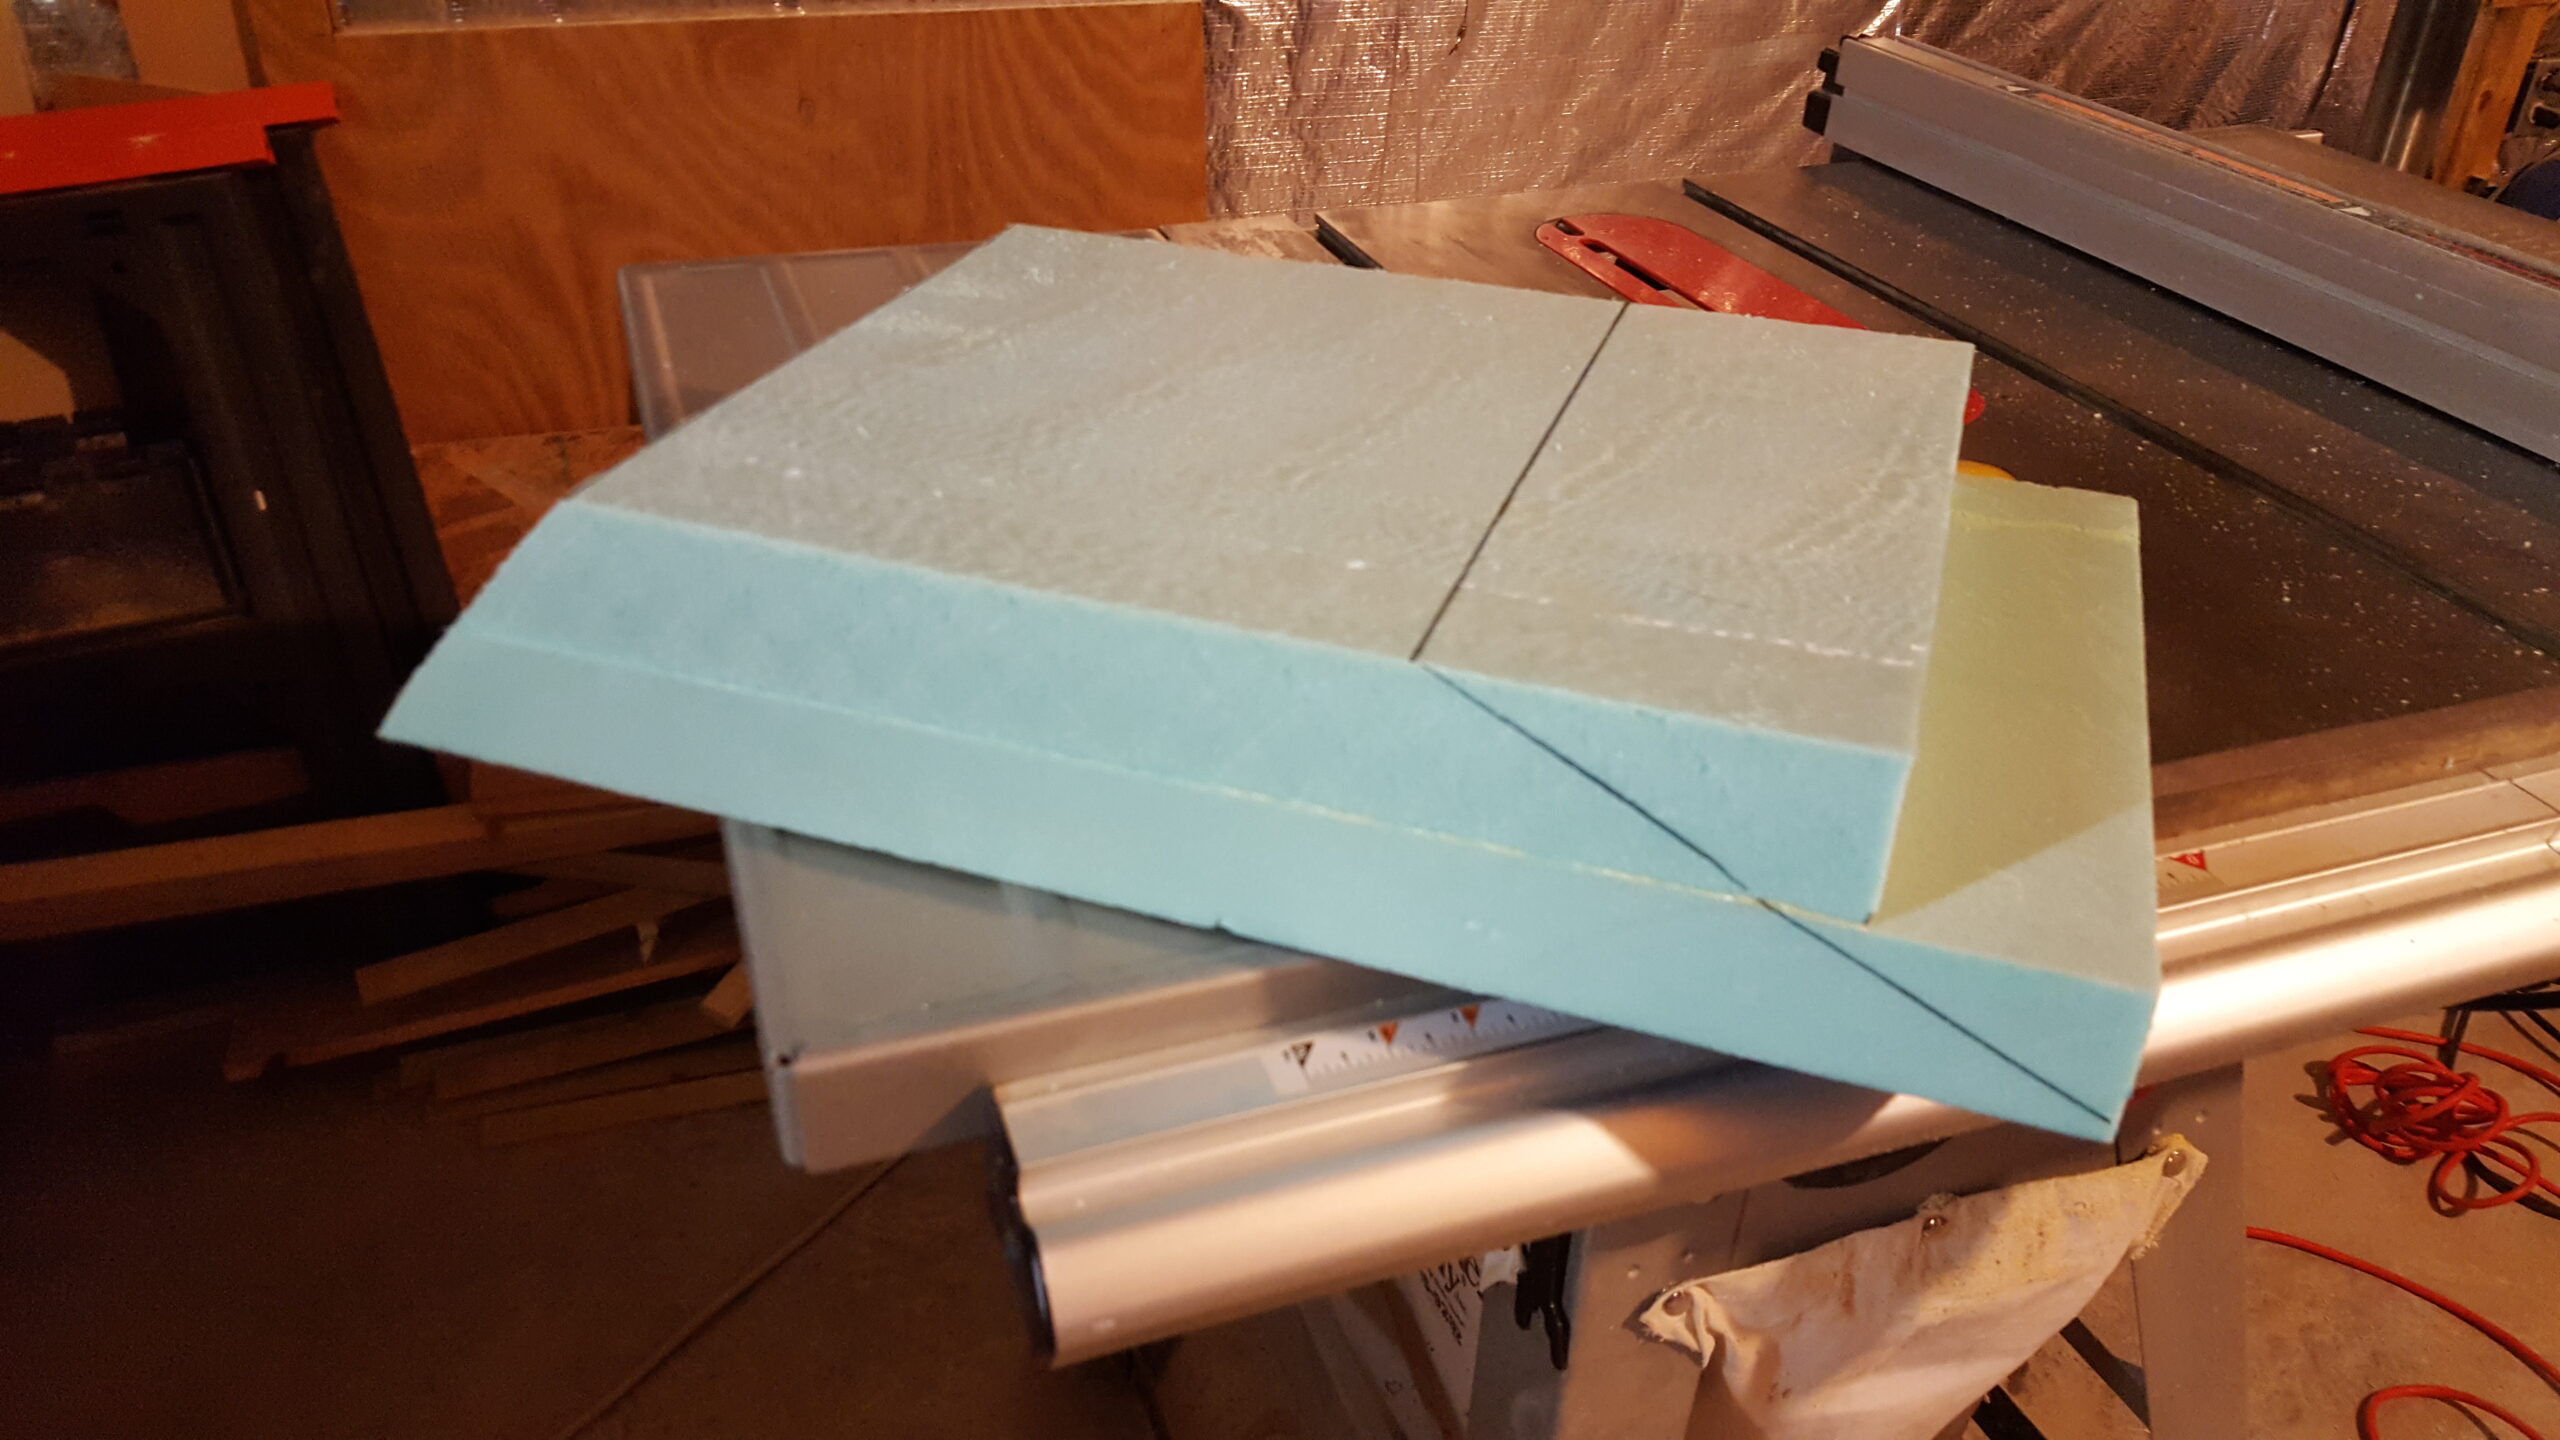
I used several tools to shape the block: a sharp utility knife, a rasp, sandpaper and—somewhat dangerously—a table saw.
The table saw produced clean, straight cuts, but feeding a large block of insulating foam across a spinning blade was not one of my better ideas. A hot-wire cutter or another tool intended for shaping foam would have been a safer choice. This is an account of what I did, not necessarily a recommendation that anyone repeat it.
The laminated block created the main shape, but installing it revealed another challenge. The surface underneath already had some shaping of its own, and the new bump-out did not transition cleanly into it. I filled some of the larger gaps with scrap foam and later used drywall joint compound to blend everything together.
This became a recurring theme: foam established the basic geometry; drywall mud convinced everyone that I knew what I was doing.
Taking Control
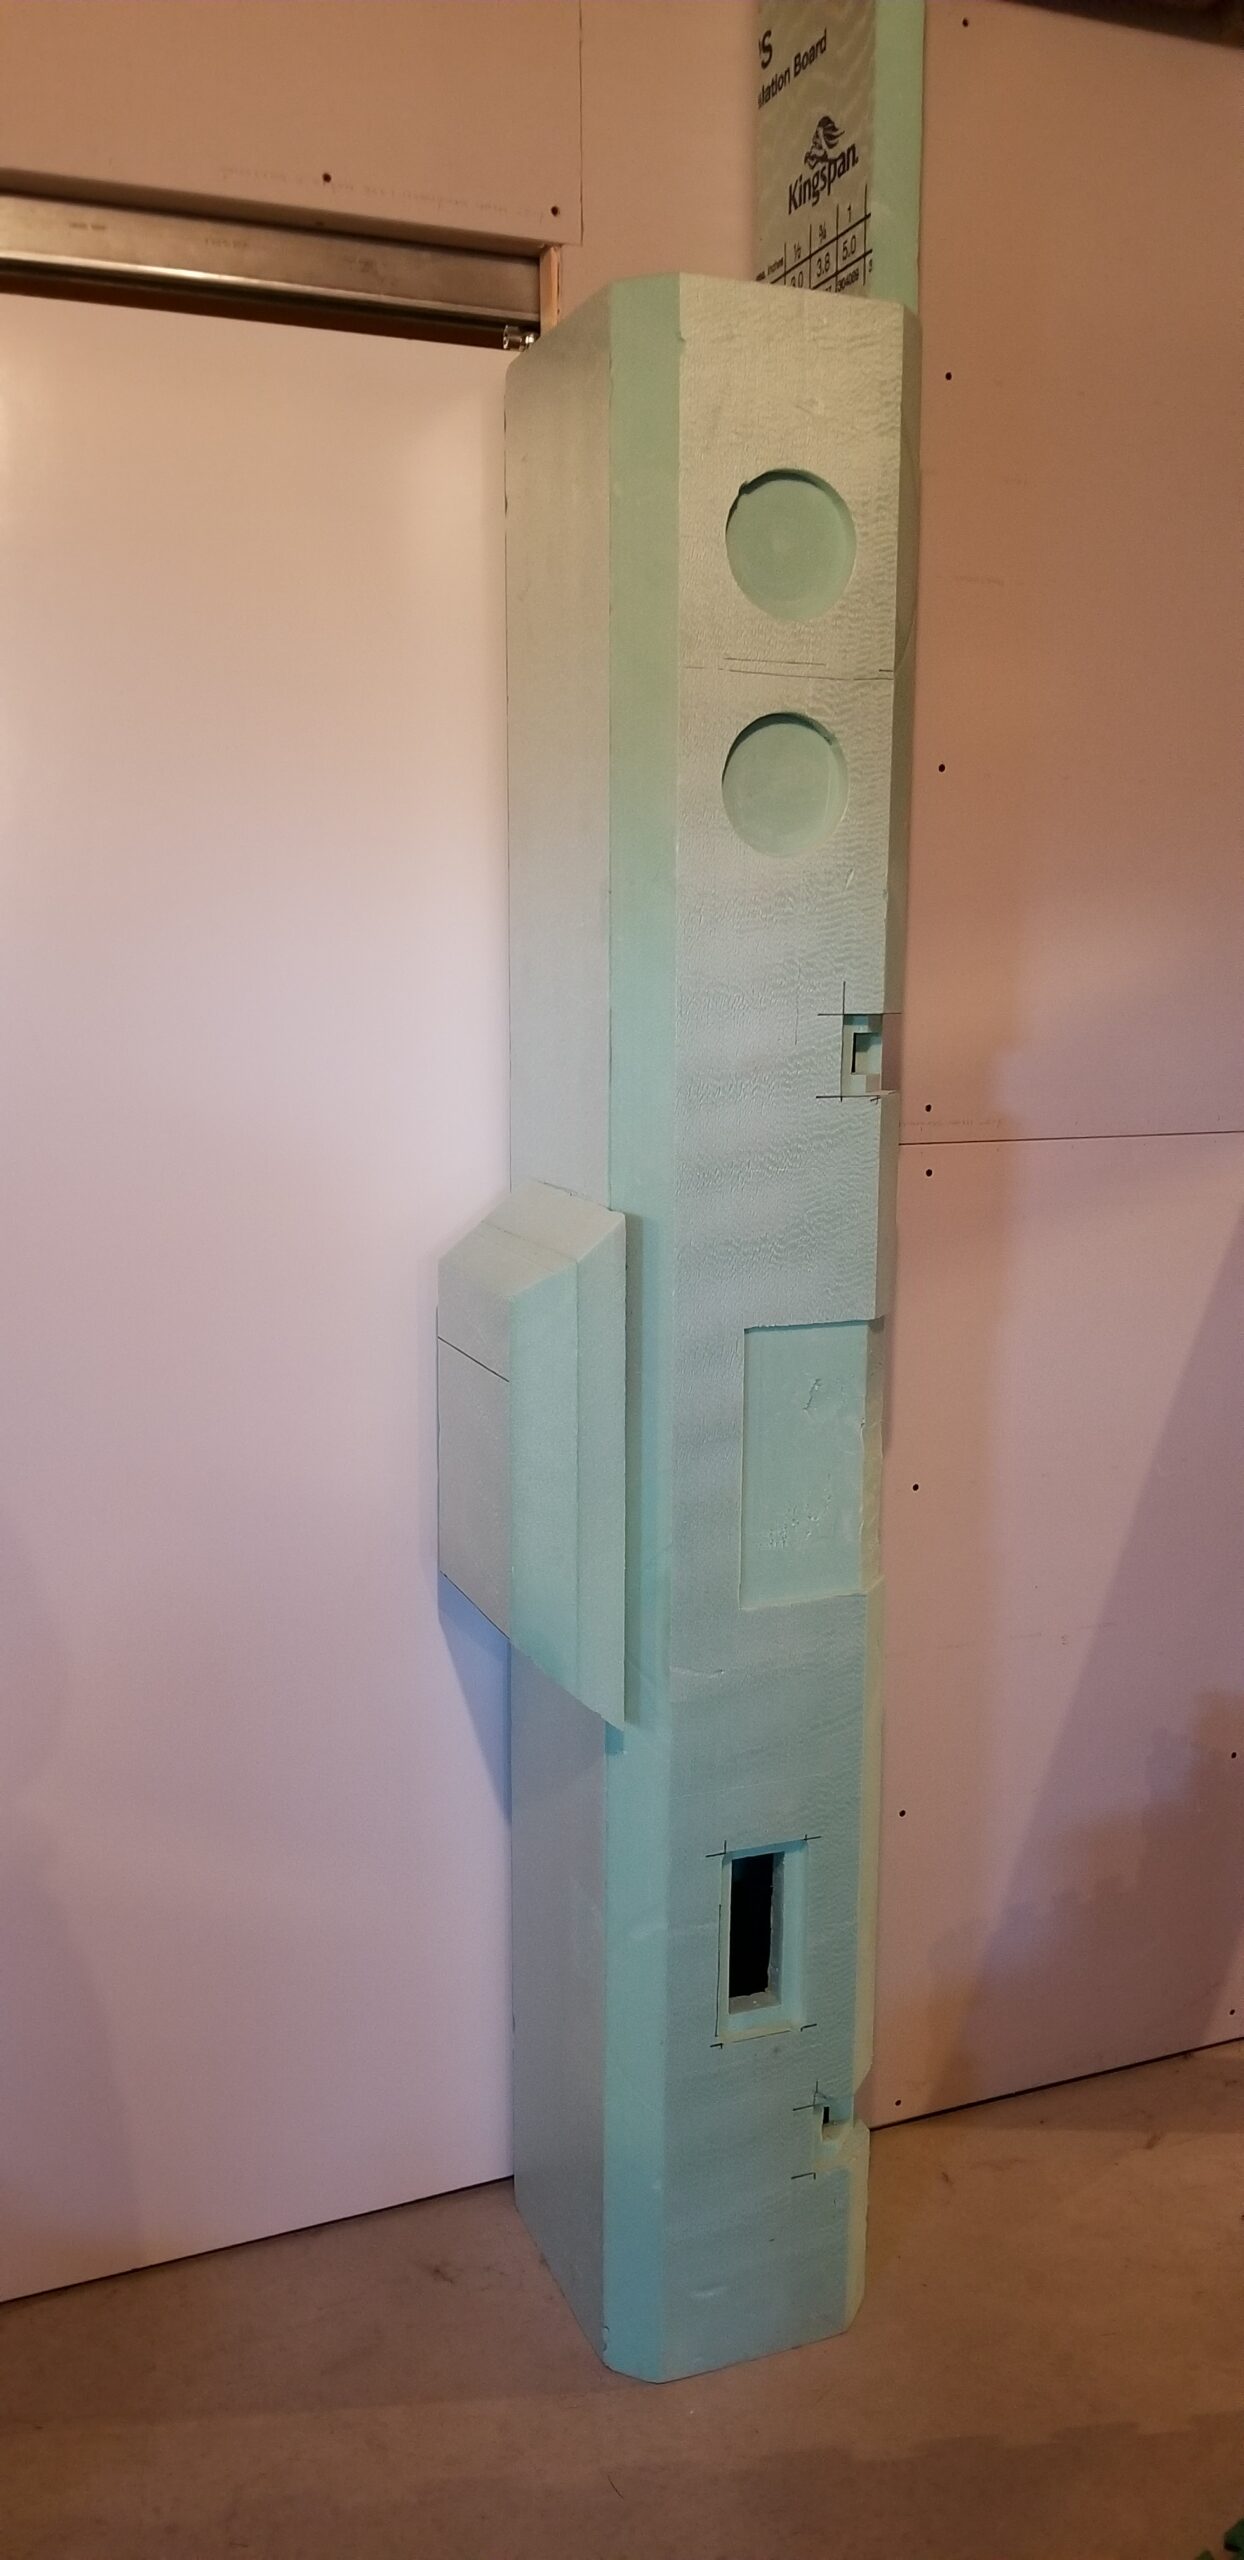
The Stertman rendering included another interesting shape lower on the opposite pillar. It looked good, but it did not appear to do anything.
I wanted more.
I preserved the approximate size and proportions of the original feature, but decided to turn it into a functional control panel. The opening and the panel evolved together, although the final panel was ultimately designed to fit the hole rather than the other way around.
I started by drawing the outline on the foam with a Sharpie.
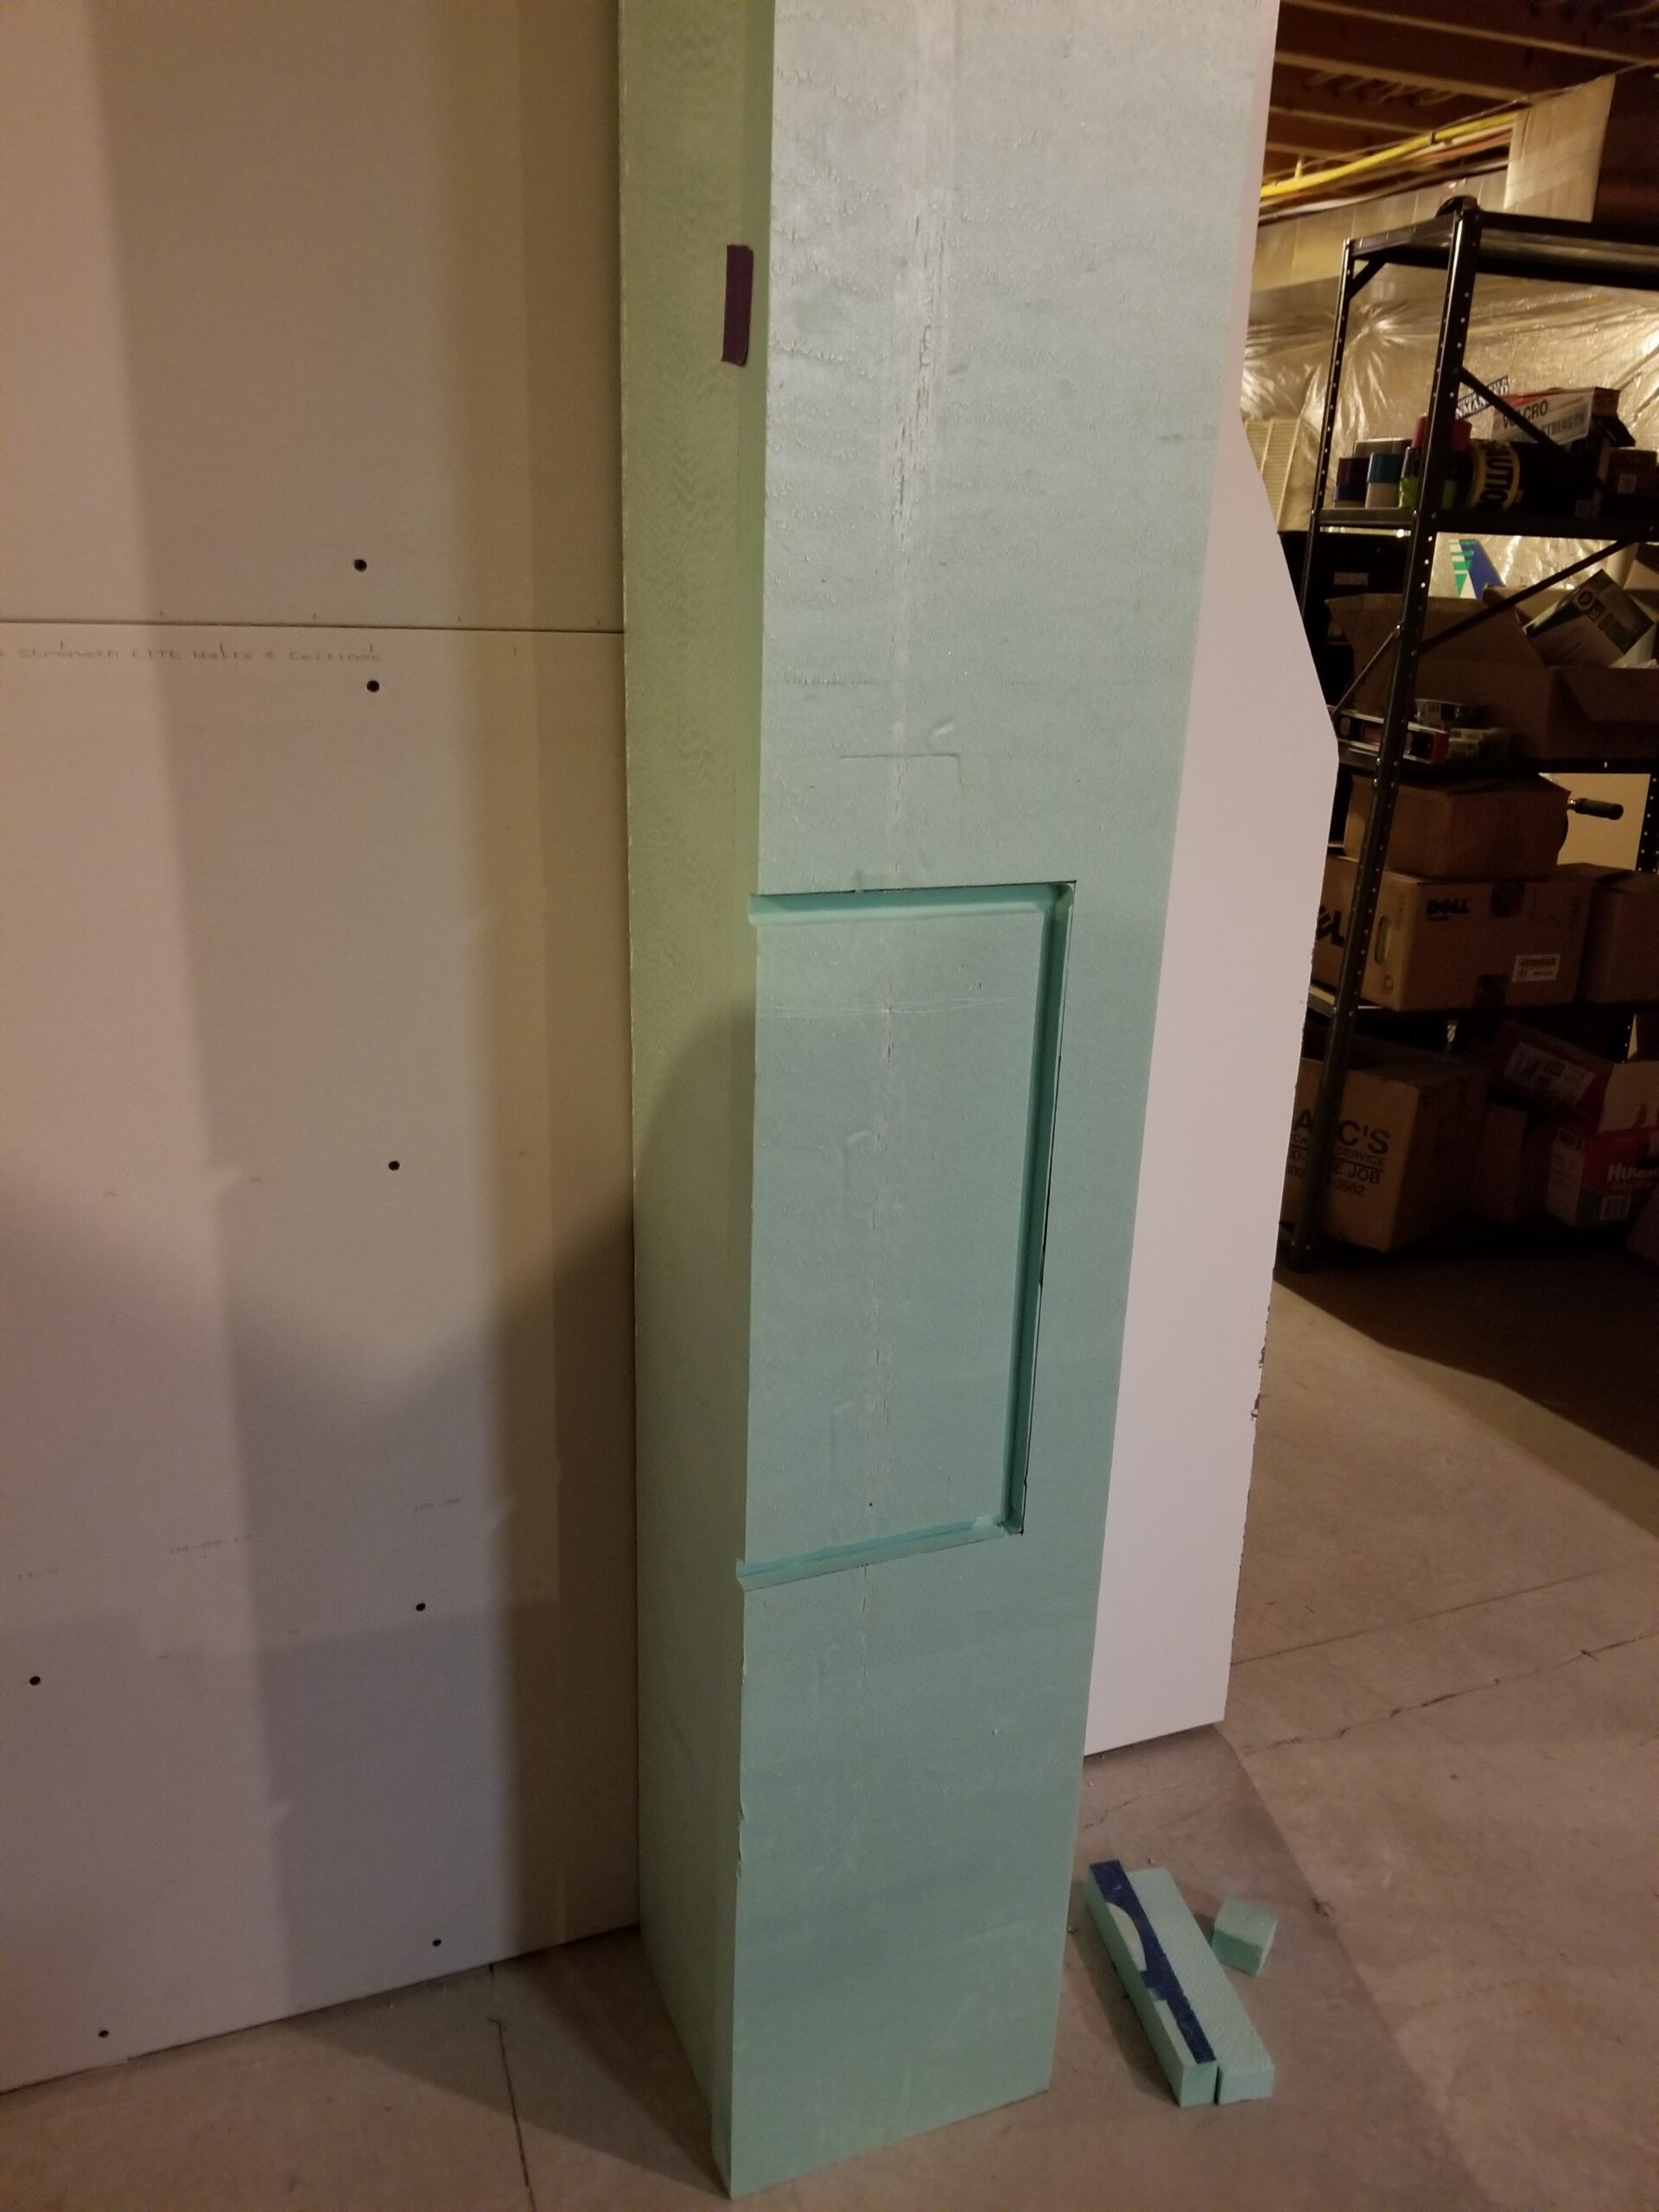
For the actual cut, I used a router fitted with a three-quarter-inch bit and guided it with a fence. The router cut the foam remarkably well. It also required a controlled hand: unlike wood, the foam offered very little resistance to keep the router from wandering somewhere it did not belong.
The recess extended through both the front and side of the facade. This allowed the control panel to sit inside the pillar instead of simply being attached to its face. The deeper opening also created room behind the panel for the switches, lights, electronics and wiring that would eventually bring it to life.
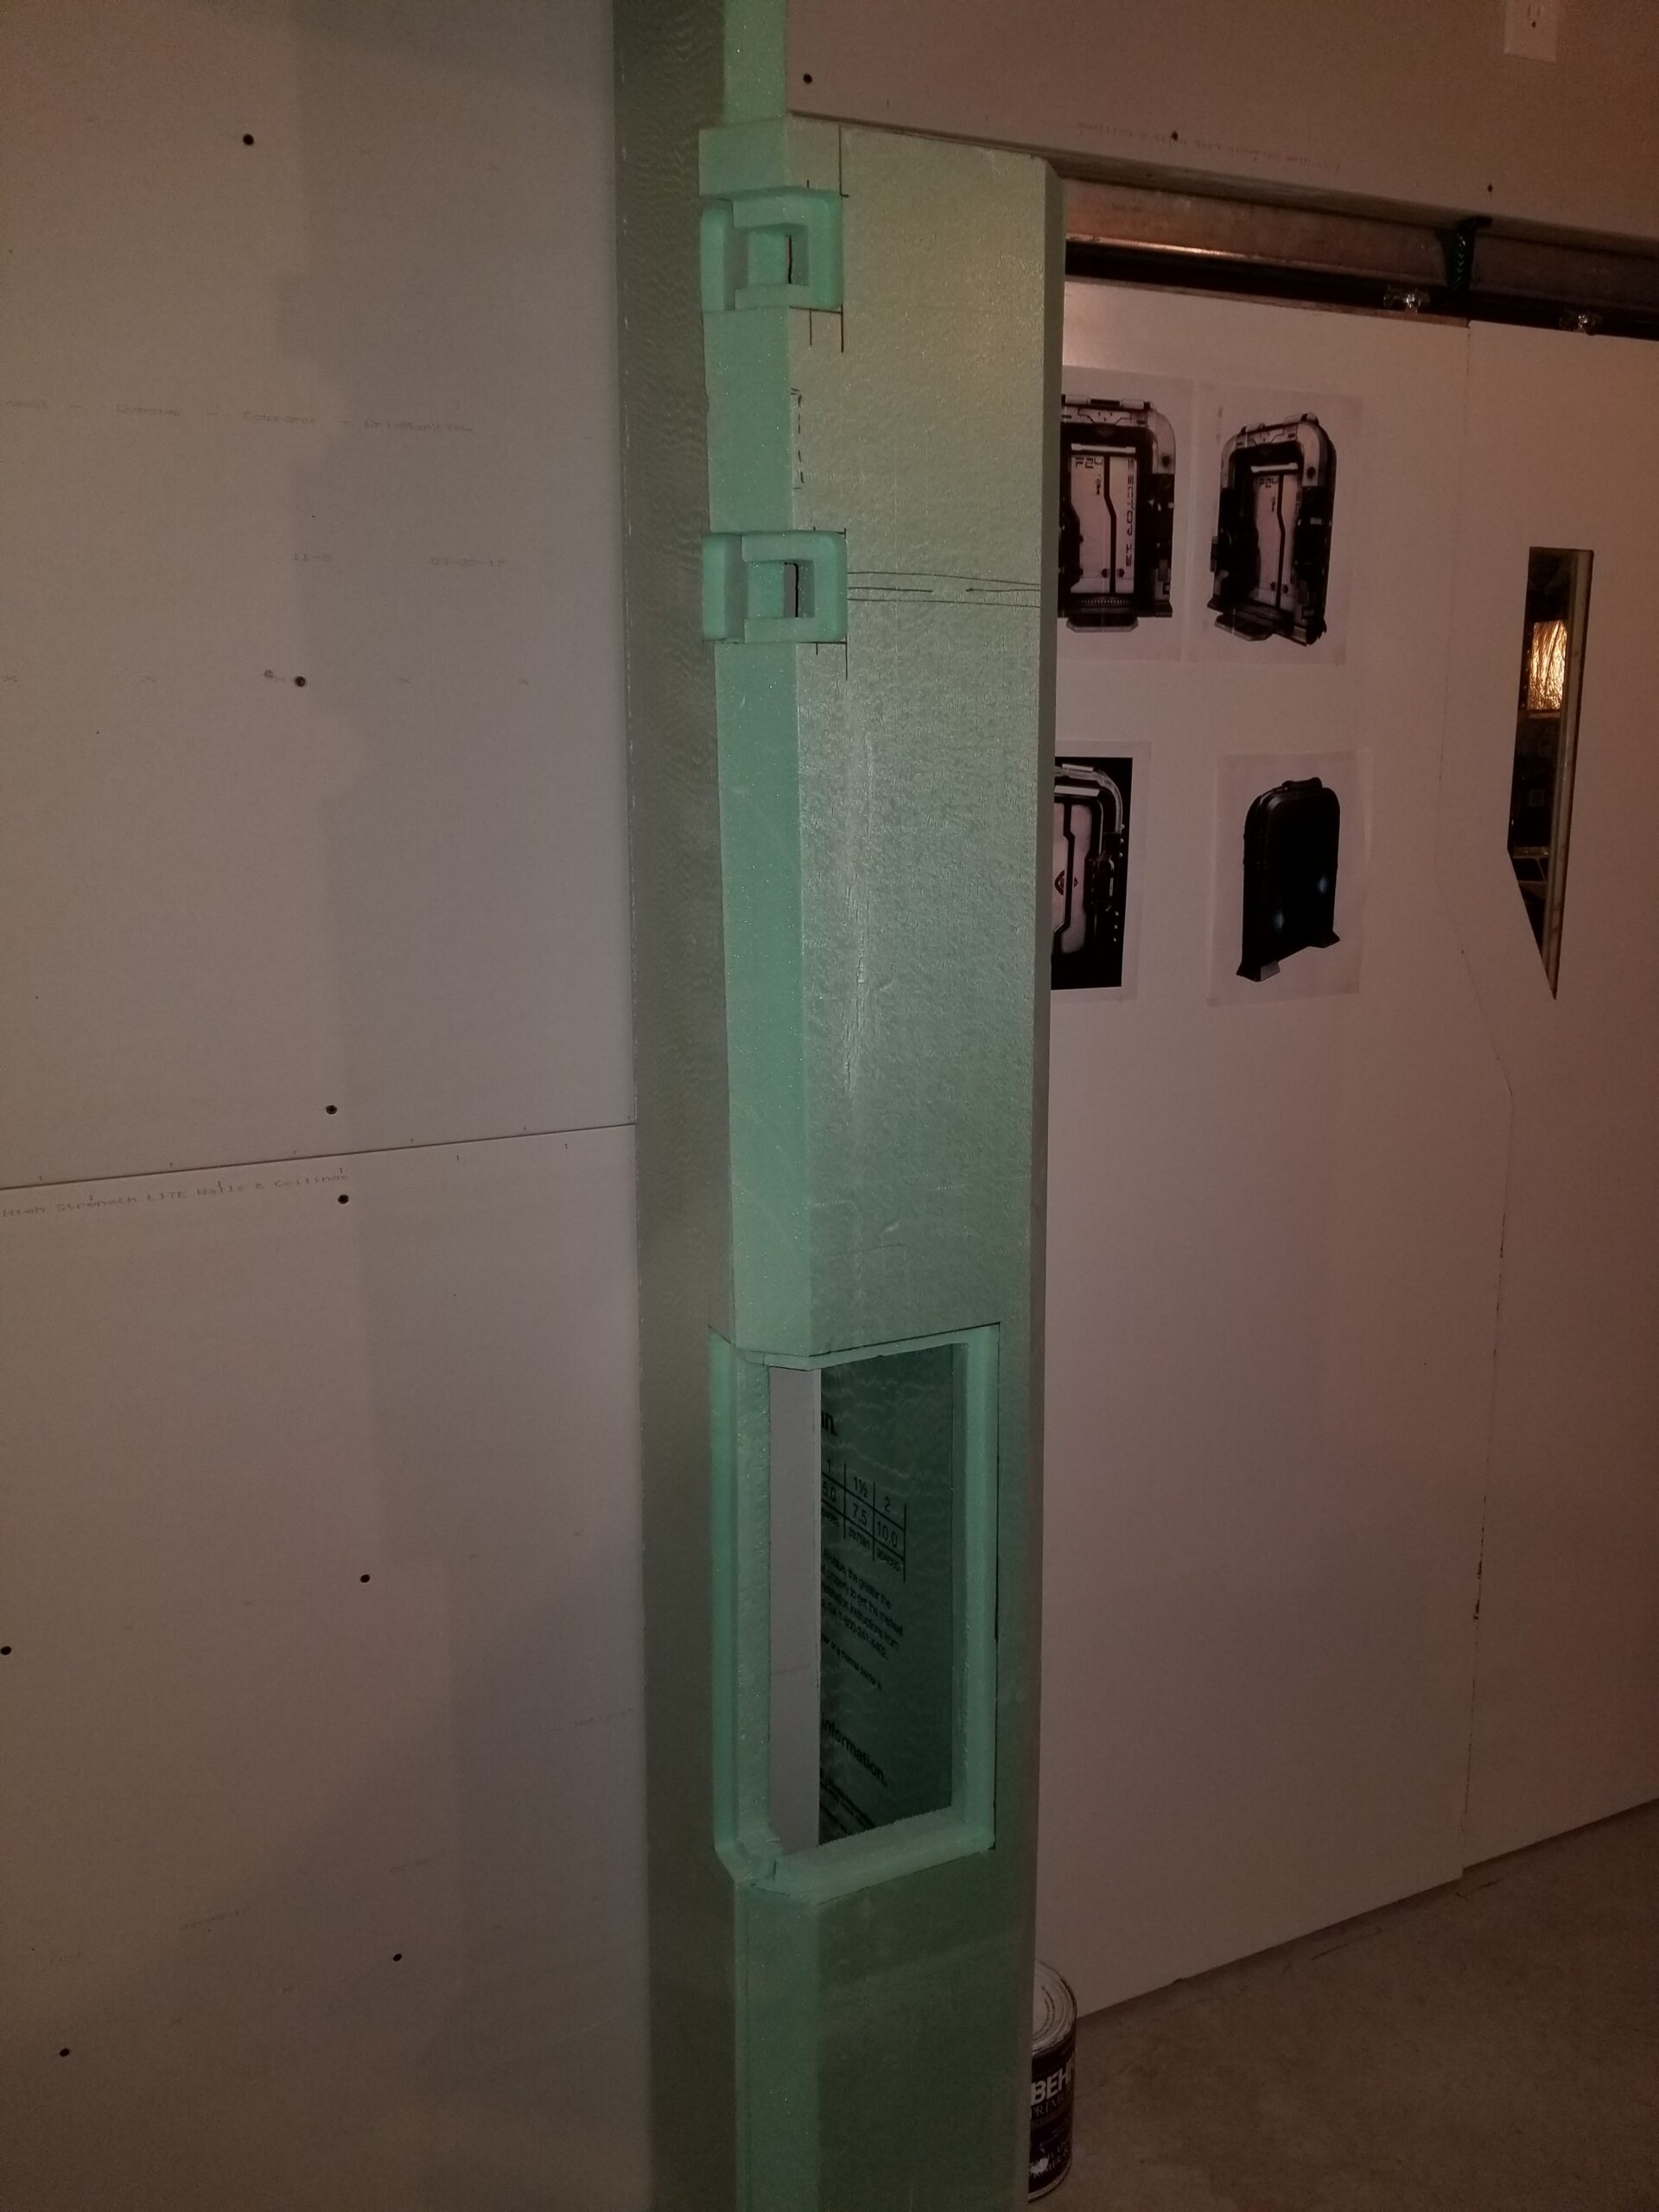
The finished control panel is held in place using small wooden toggles. It can be secured inside the opening but easily popped back out when I need access to the electronics. That proved particularly useful during assembly and wiring and will undoubtedly prove useful again the first time something stops working.
We will return to the control panel and its electronics in a later post. For now, it was enough to have created a place for it to live.
Trouble at the Top
With the vertical sections taking shape, I turned my attention to the large horizontal component across the top of the doorway. In the finished airlock, this section is painted to resemble a metallic bulkhead. At this stage, however, it was still a very large collection of green foam.
The first version began as one continuous piece spanning the entire opening.
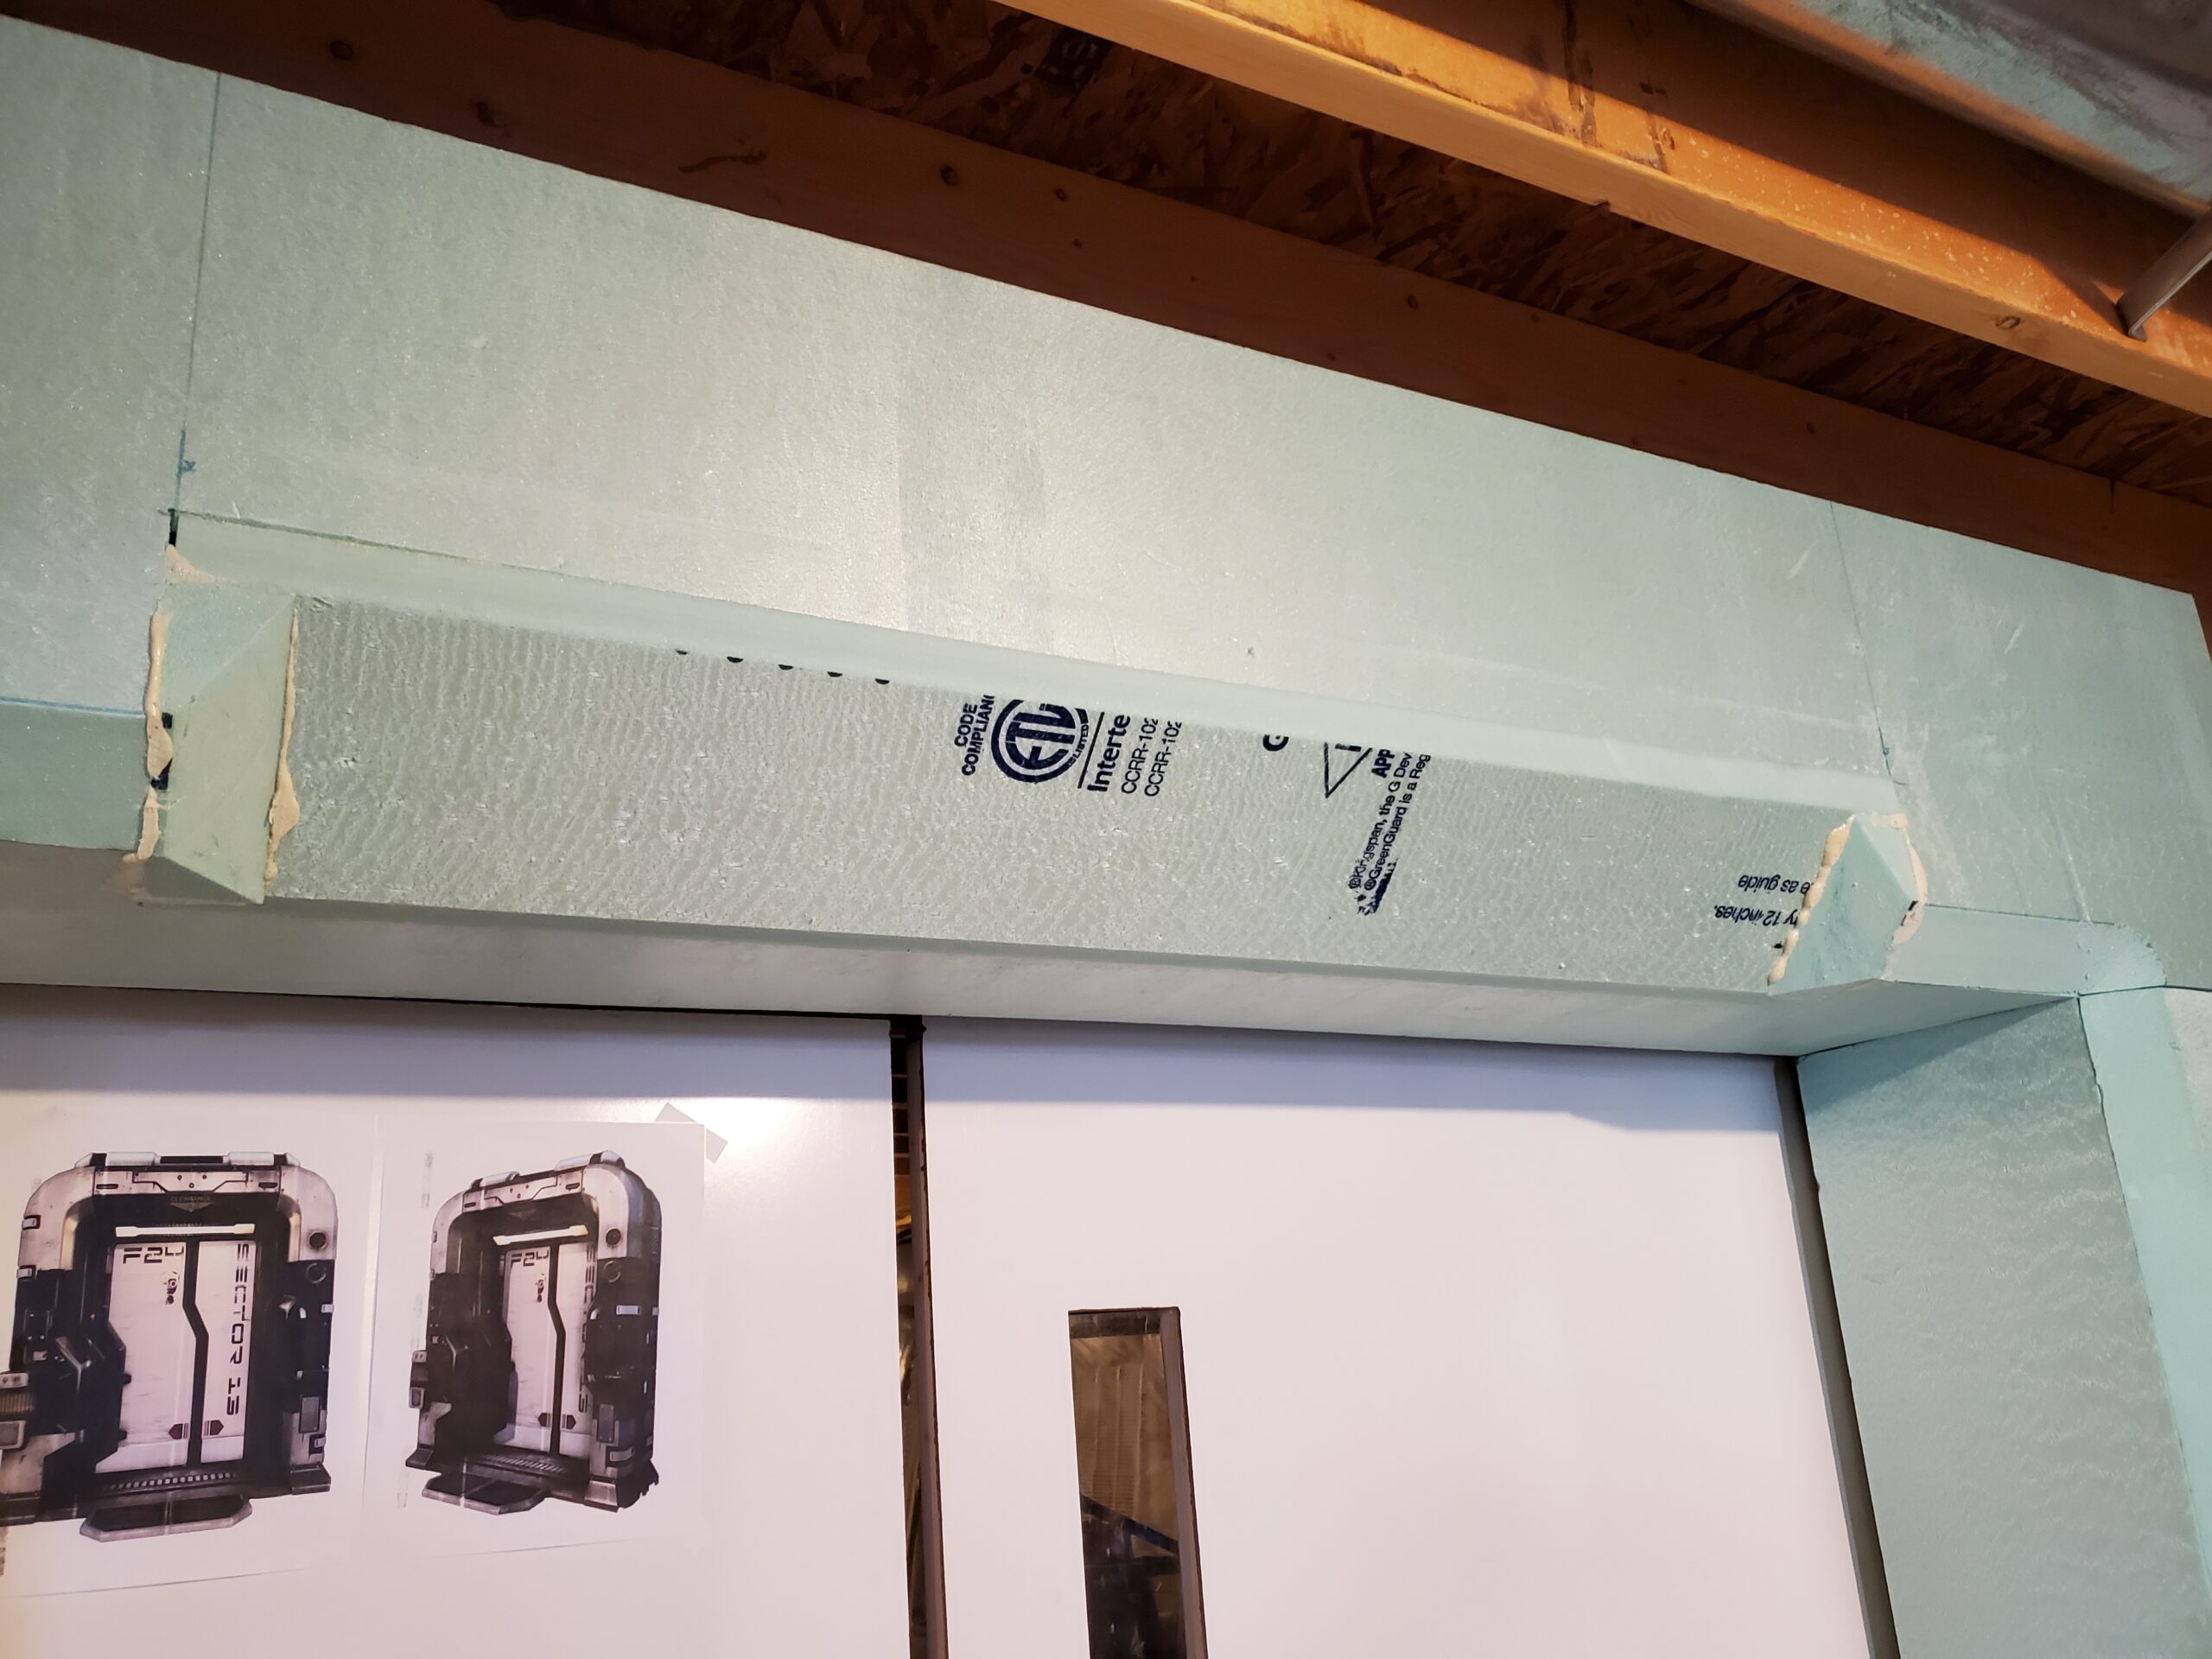
I shaped the front and bottom surfaces and began creating the angled lower panel that would eventually house a light. Even in unfinished foam, the added layers made the area much more interesting.
Then I reached the corners.
The horizontal bulkhead needed to blend smoothly into the vertical pillars. That transition was not a simple rounded edge. It was a compound curve moving through several surfaces at once. I could carve something close, but making the two separate foam assemblies appear to flow cleanly into one another was going to require a heroic amount of filling and sanding.
After trying to fill the transition the first time, I could see where this was heading.
It was not heading anywhere good.
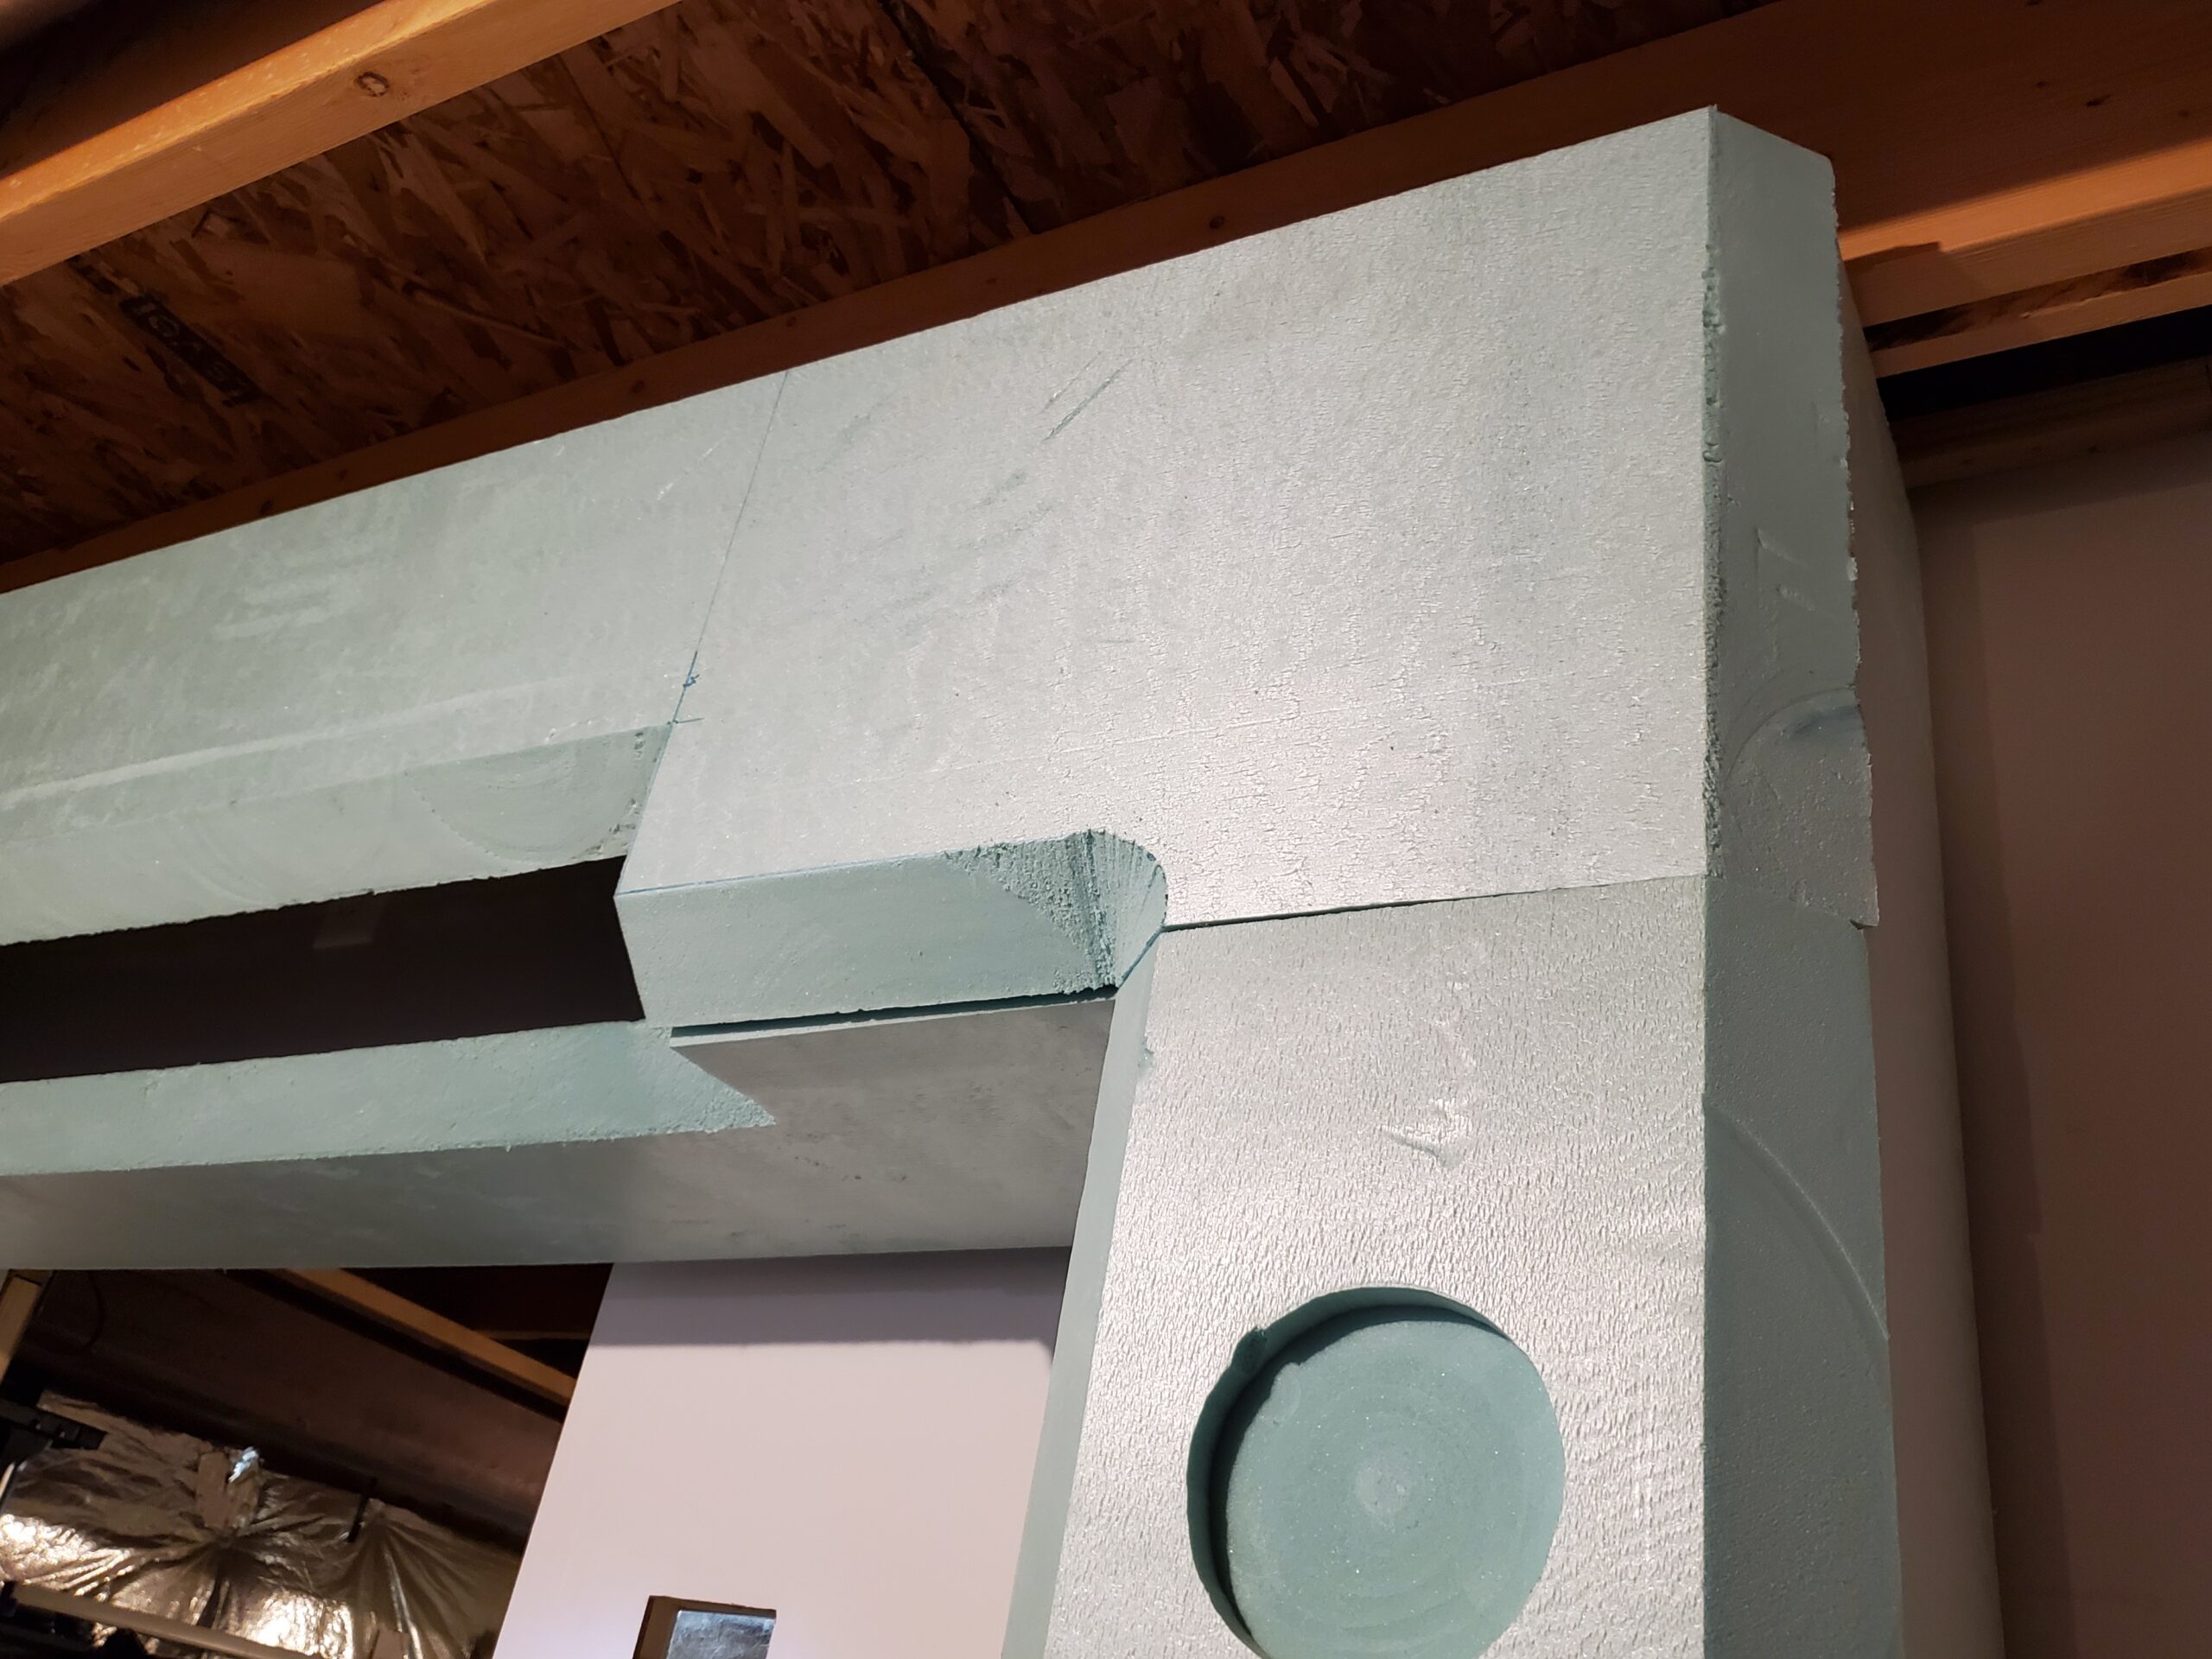
The design also presented a larger practical problem. If I continued along this path, nearly the entire facade would become one enormous solid piece. Moving it would be difficult. Removing it would be worse. Even finishing it would require working on a large assembly while it remained installed around the doorway.
Initially, I had imagined that the top would simply sit on the two side pillars. In practice, that approach was not going to produce a clean result.
Something had to change.
There Is No Going Back…Probably
The solution was to extend both side assemblies all the way to the ceiling and shorten the central bulkhead so it could fit between them. The difficult curves would become part of the side assemblies. The center section could then terminate in simple straight edges.
This was clearly a better design.
Unfortunately, implementing it meant cutting apart a large piece that already felt complete.
I use the word “felt” intentionally. It was not actually complete. There was still a great deal of shaping, filling and finishing ahead. Nevertheless, putting a large developed piece on the table saw was stressful. One bad cut could destroy a substantial amount of work.
I also did not know whether I could successfully extend the side sections using the pieces I removed. The new joints needed to be strong, aligned and invisible from the front.
There was only one way to find out.
Before making the cut, I recessed and glued wooden plates into the foam on both sides of the planned separation. Installing them while everything was still one piece preserved the original alignment.
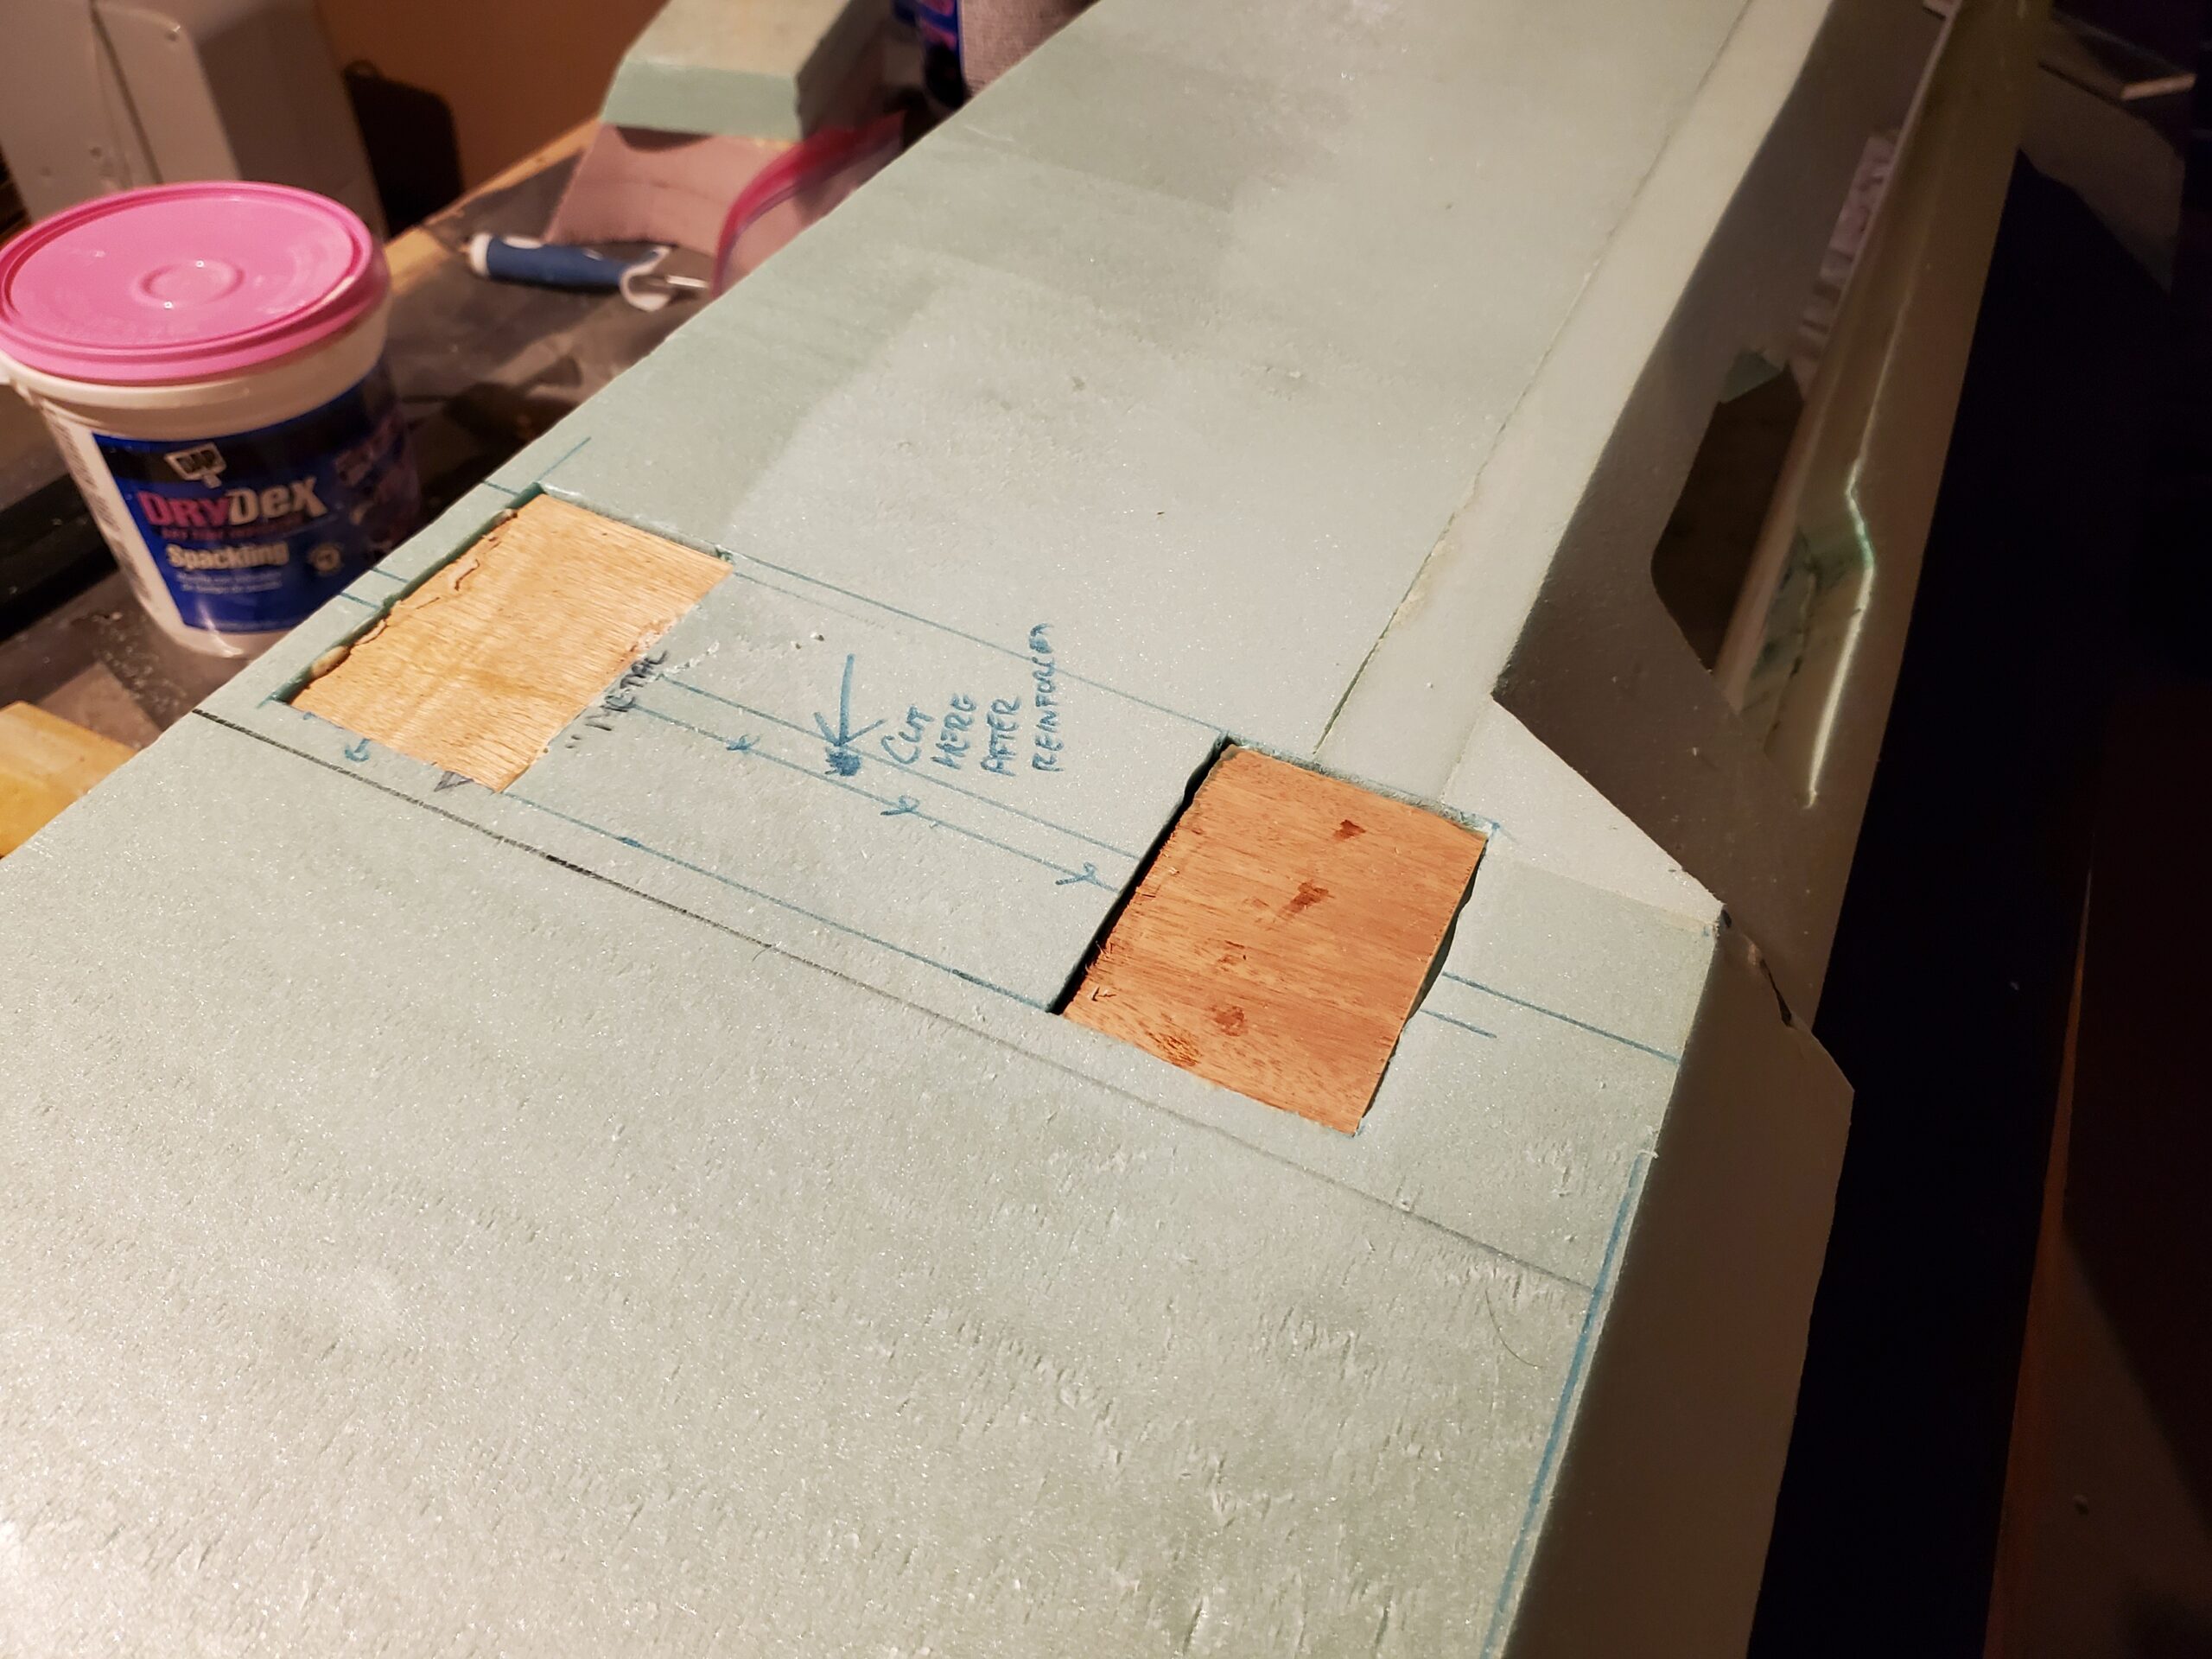
Then I cut through the bulkhead.
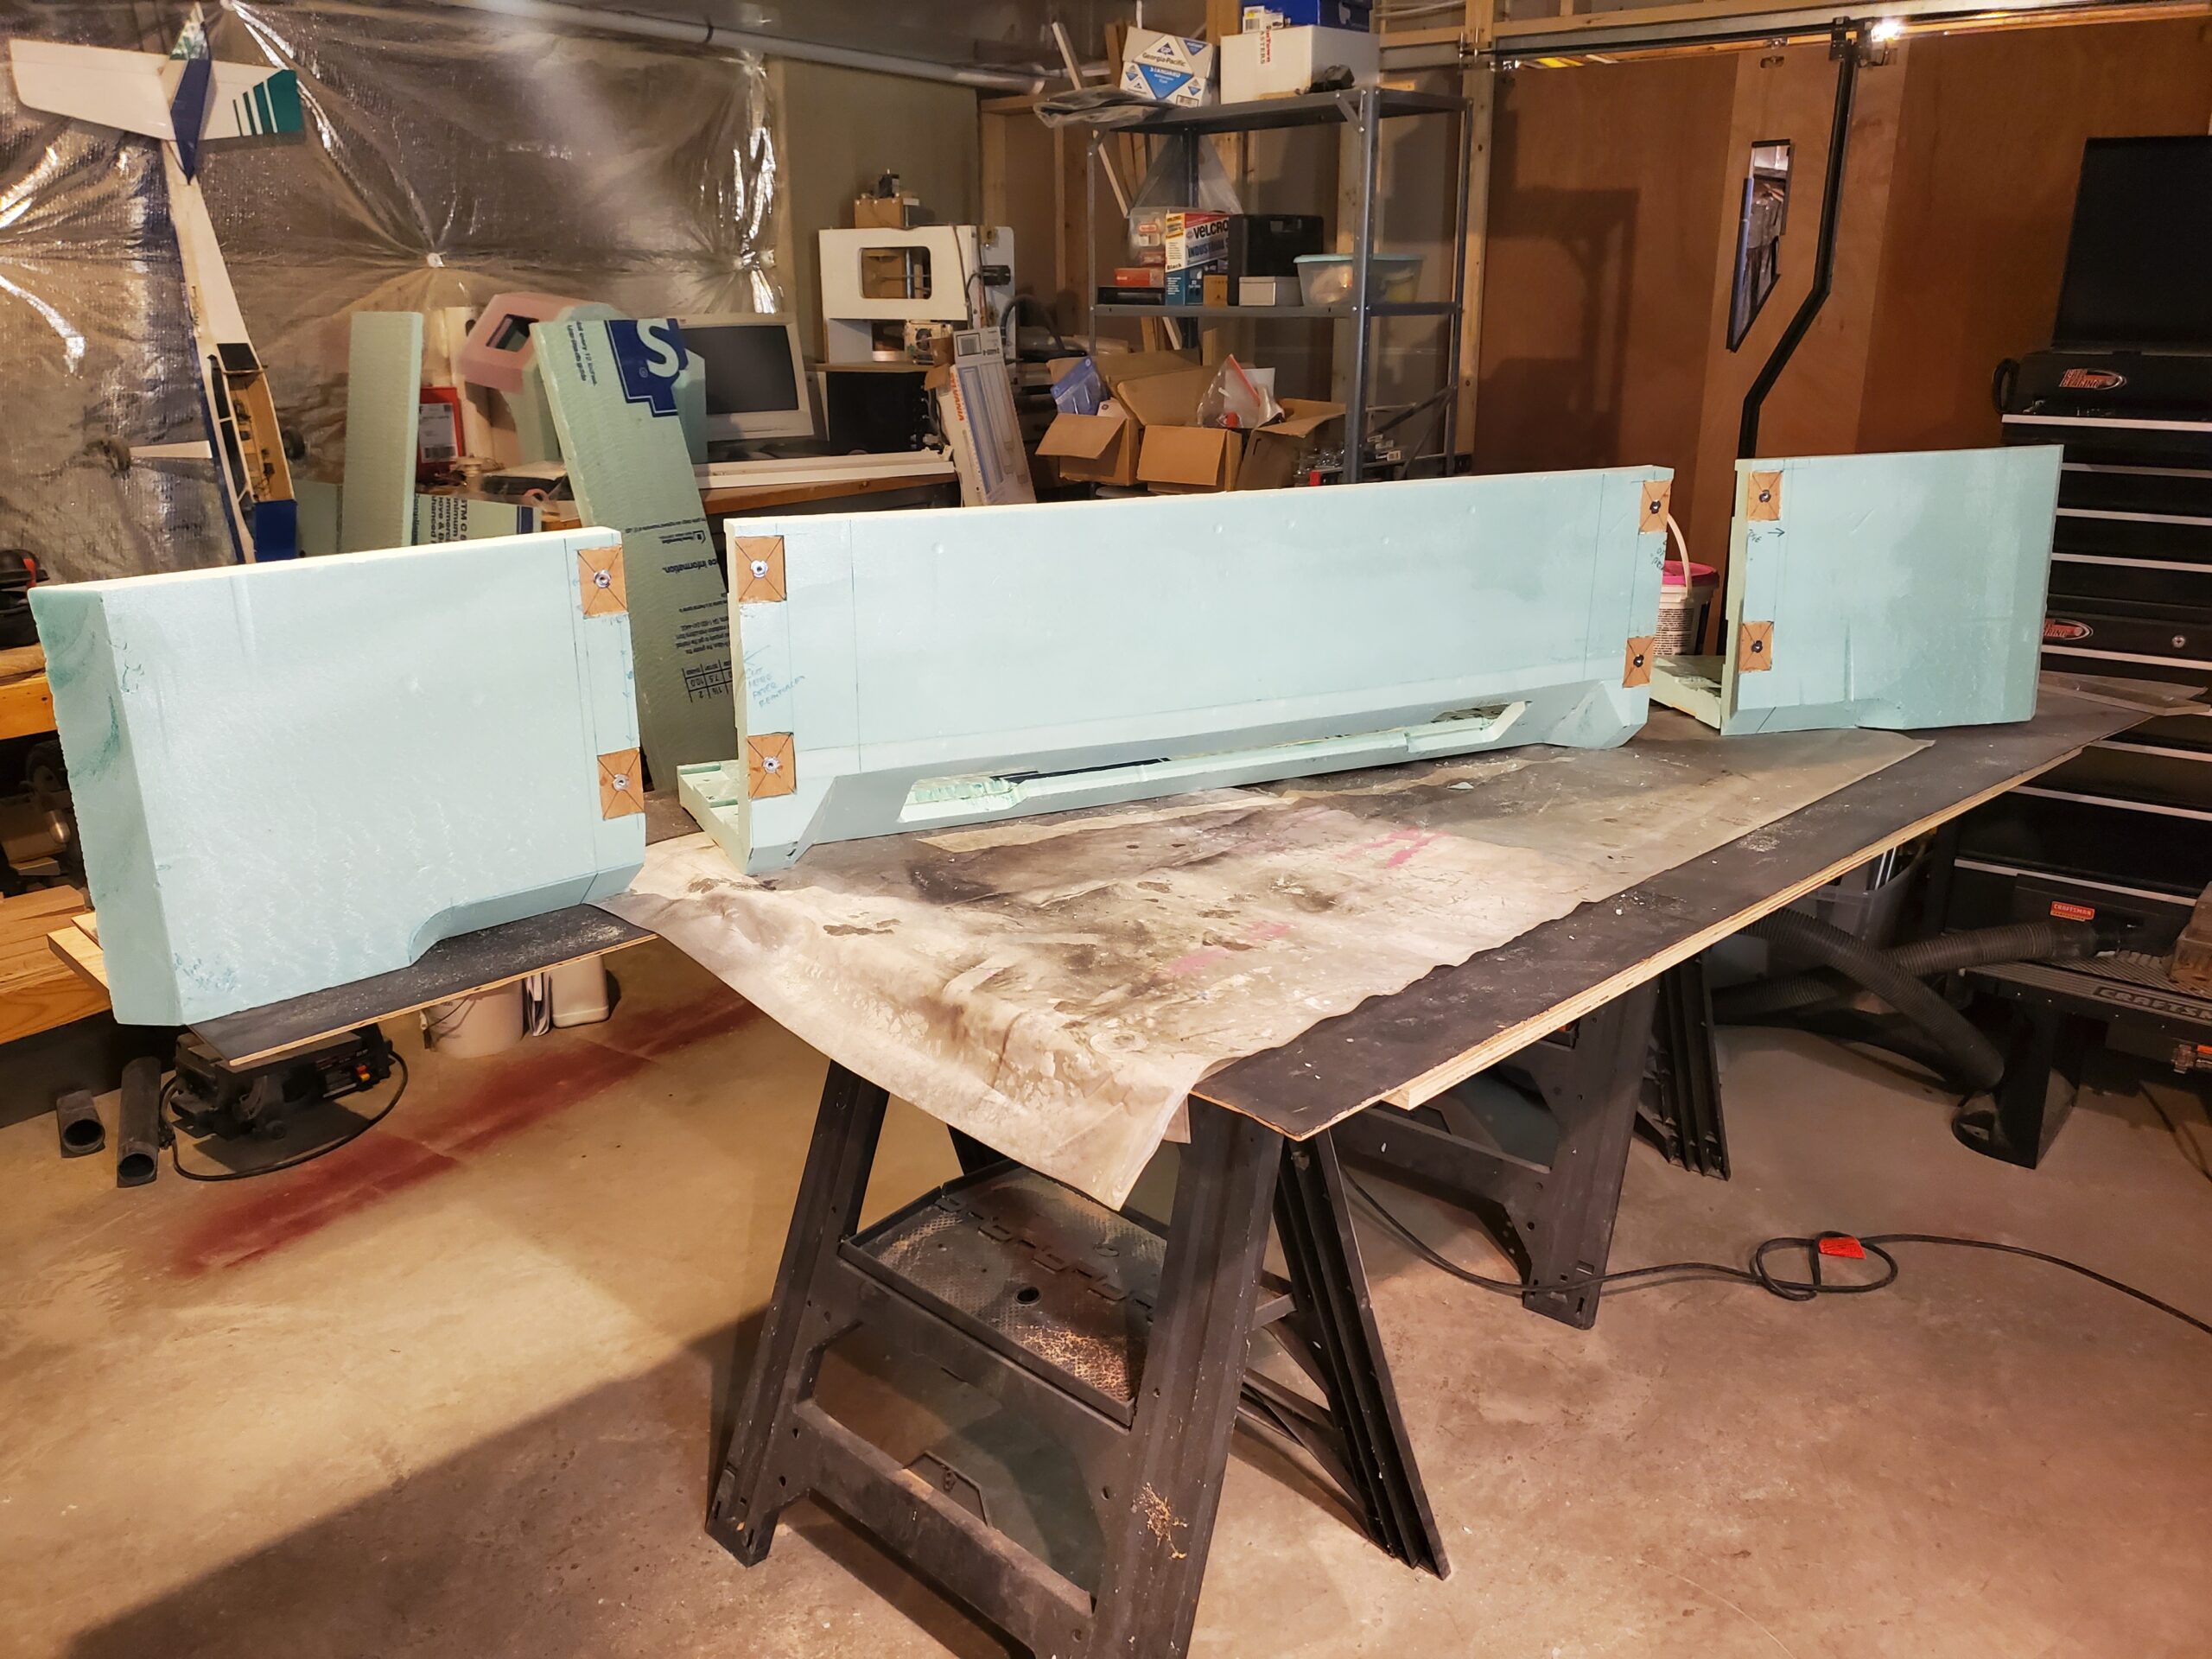
The wooden plates provided solid mounting points for hidden T-nut fasteners. With the rebuild complete, the central bulkhead could be connected securely to each side assembly and disconnected when necessary.
I do not have a particularly good picture (or, seven years later, a particularly good explanation) of every detail in that connection. What matters is that it worked.
From the front, there is no visible indication that the extended side assemblies were created by joining the offcuts back onto the pillars. The seams disappeared beneath the filling and finishing work. Unless you look behind the facade, you would never know that the structure had been cut apart and rebuilt.
Curves in All the Right Places
Moving the compound curves onto the side assemblies made the geometry much easier to manage. Each curved corner could be shaped as part of a single piece instead of trying to blend two large assemblies together after installation.
The center bulkhead was rebuilt with additional layers of foam, including the long inset intended for the light panel. I also created the oddly shaped insert around that opening—the piece I have been calling the “keyhole.”
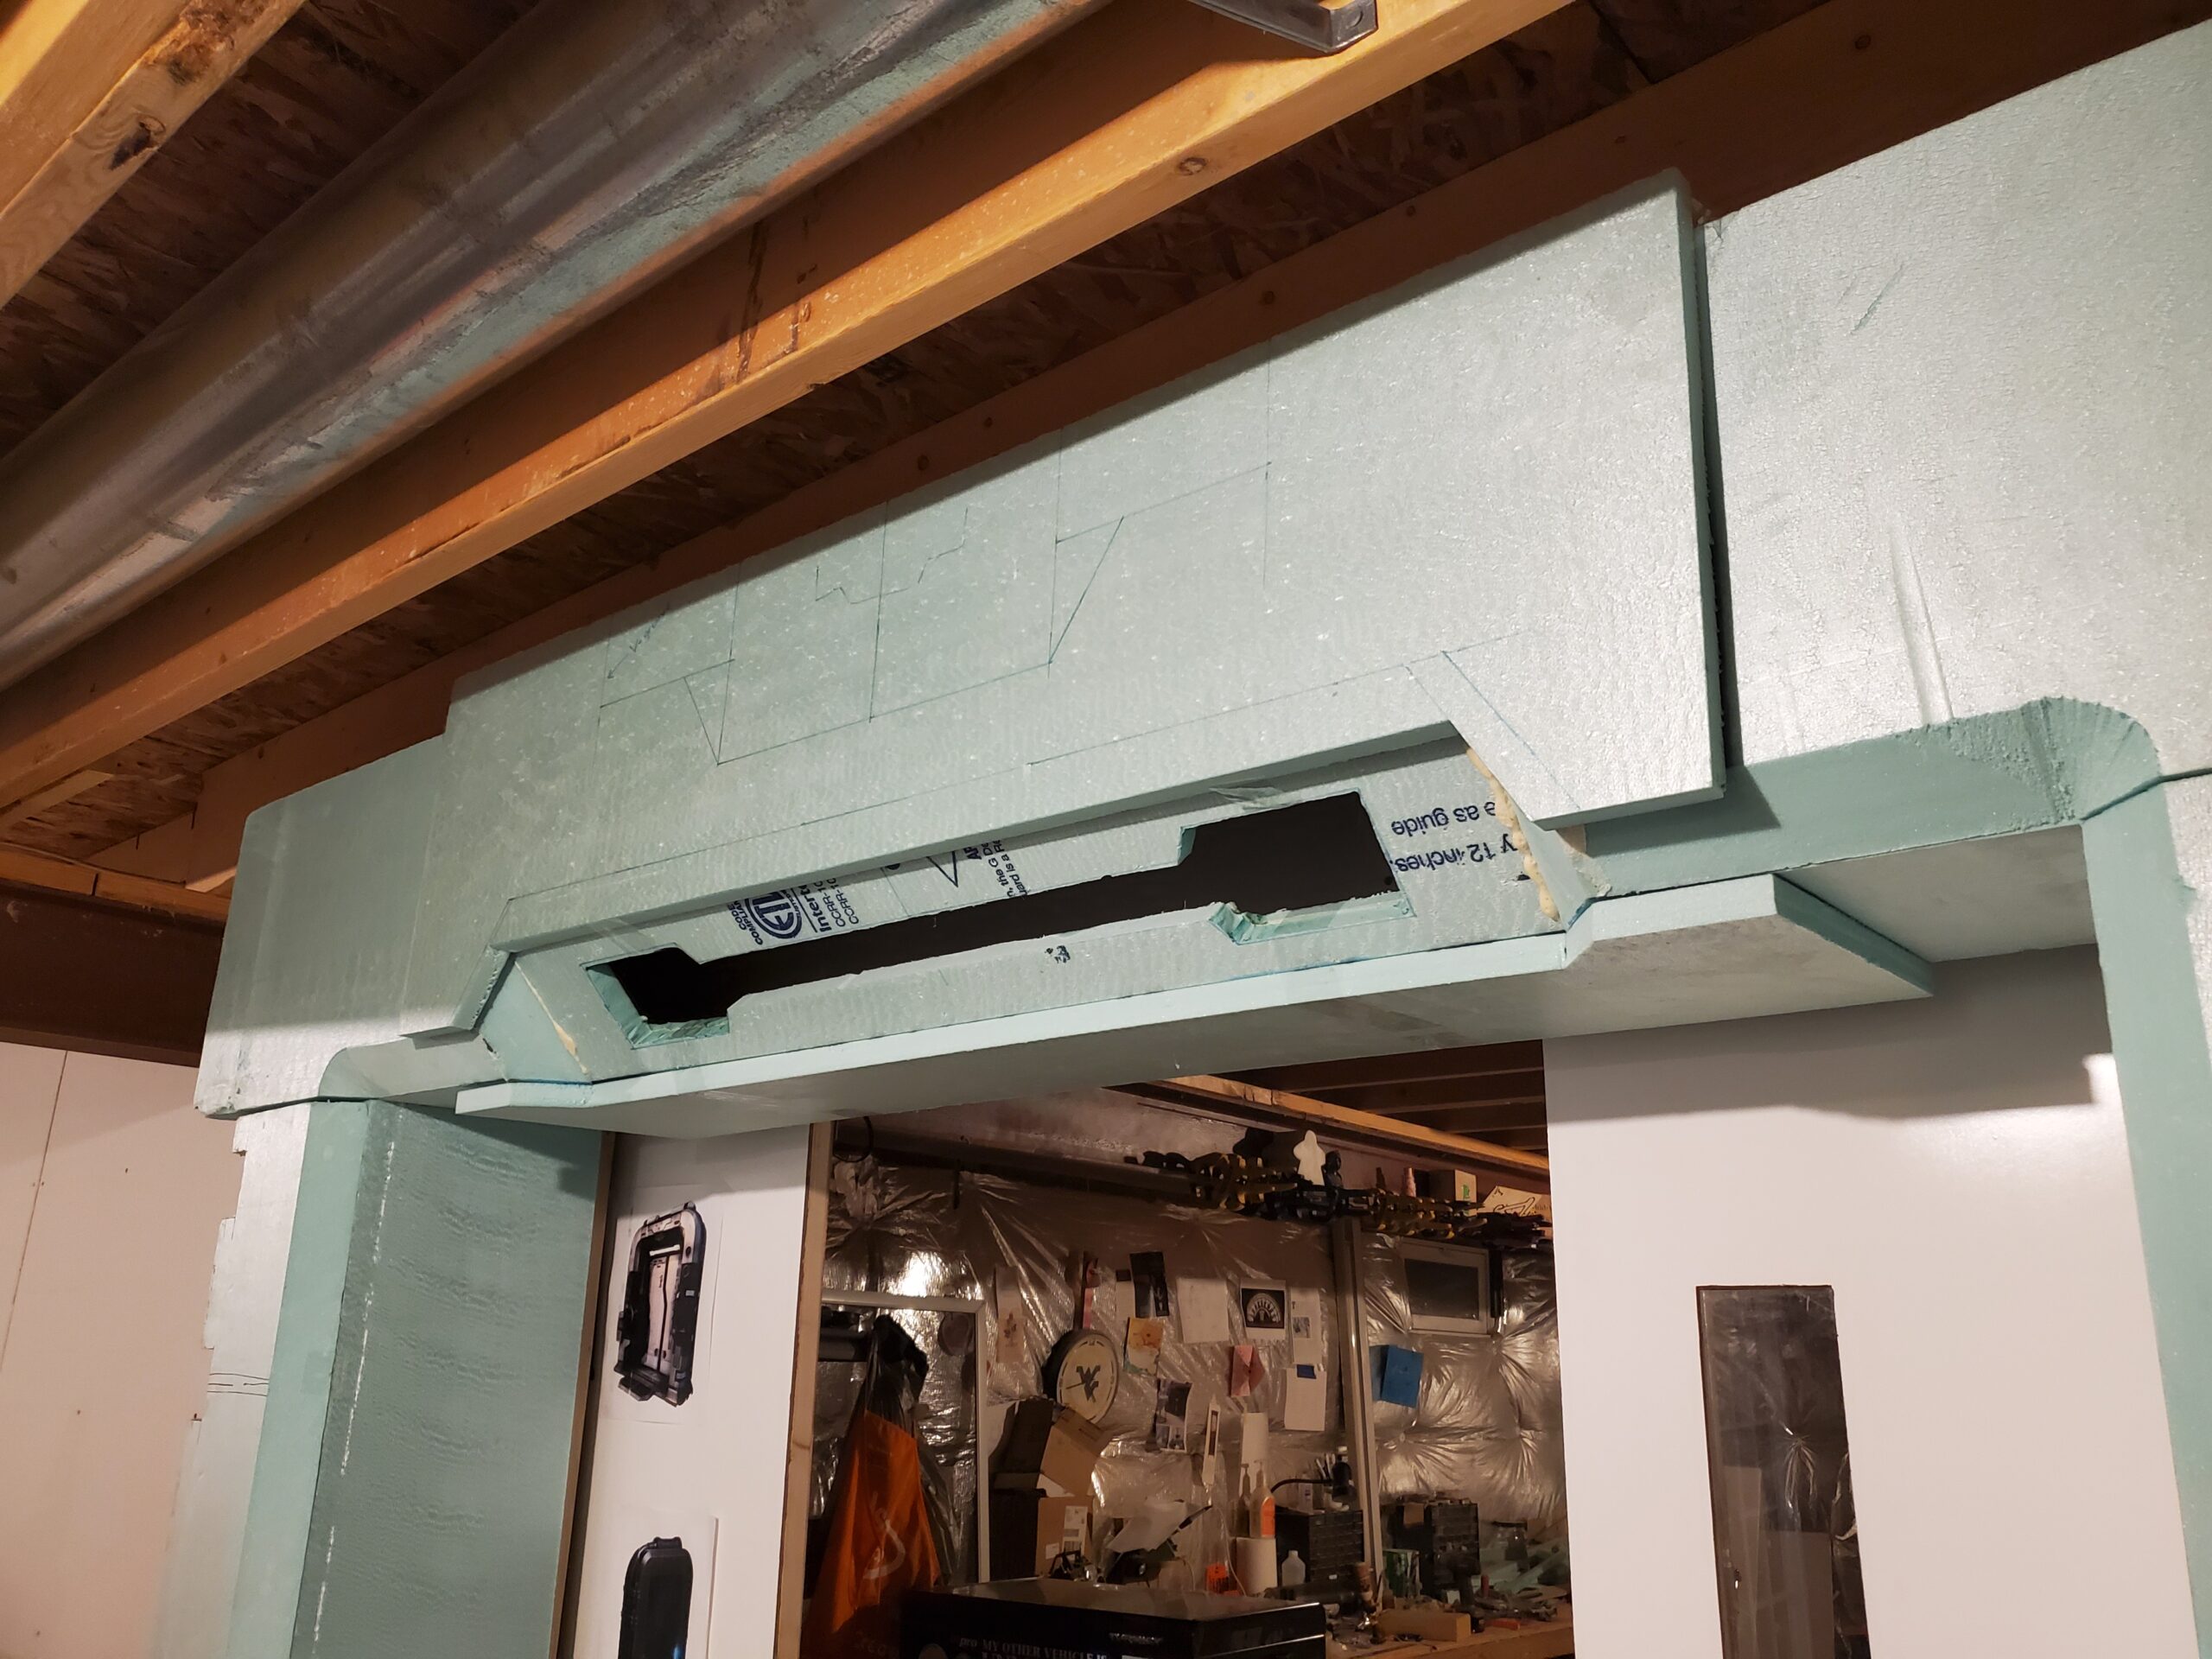
Once the major forms were complete, I used drywall mud to fill seams, soften transitions and hide the evidence of my earlier decisions. After sanding and priming, the three separate pieces read as a single continuous structure.
The final overlay added another raised layer to the face of the bulkhead. Ironically, the rebuild produced more dimensionality than I had originally planned. What began as a frustrating correction ultimately made the facade look better.
Modular Is a Feature
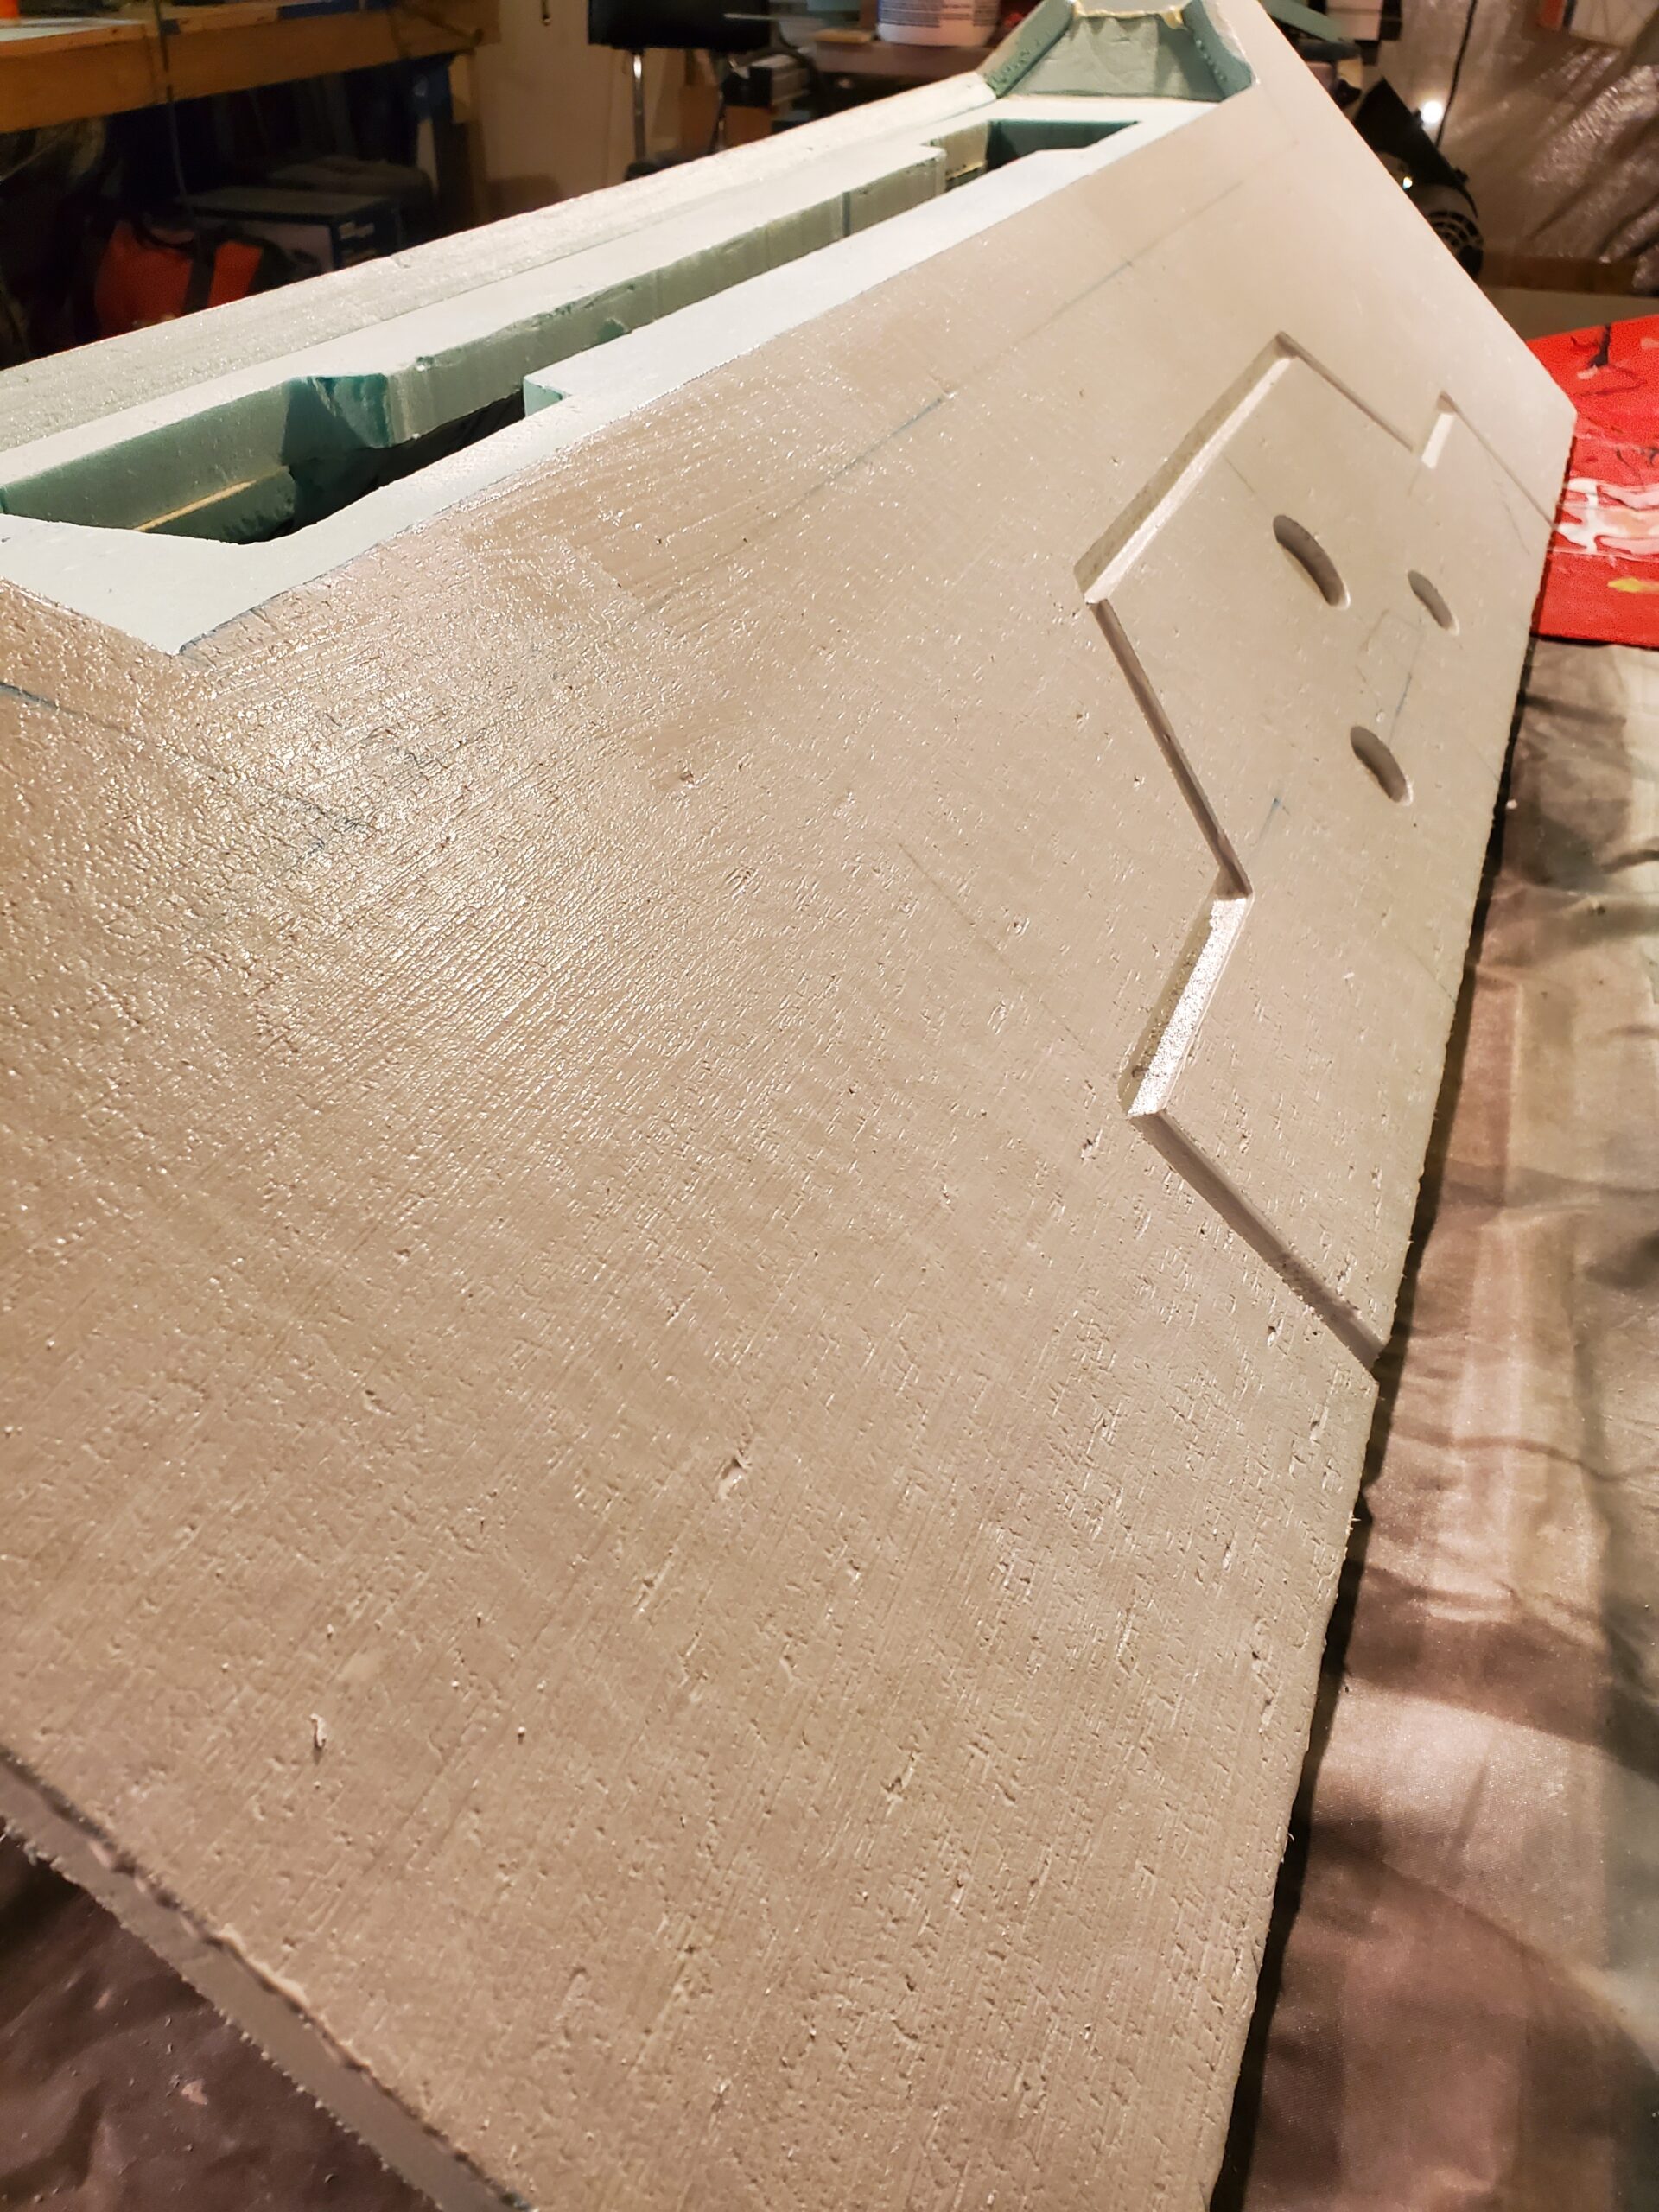
The rebuilt facade consists of three independently removable assemblies: the left pillar, the central overhead bulkhead and the right pillar. Wiring passes across the top, so removing everything would still require some electrical disconnection, but the physical structure no longer has to move as one gigantic piece.
That modularity made the remaining work much easier. I could remove individual sections, lay them flat, and finish them on a worktable. Painting, sanding and installing components became much more manageable.
Fortunately, I have not needed to remove the completed facade since installing it.
Yet.
The overhead light assembly also projected downward into the doorway, so I had to keep an eye on headroom while adding layers. There is still plenty of clearance for a typically tall person, and no one has hit their head so far. If someone unusually tall visits, I suppose ducking beneath a futuristic bulkhead will only add to the authenticity.
You Don’t Need All the Answers
Looking back, I would design much more of the project before beginning construction. My later steampunk facade project taught me how quickly a build can progress when the design has already been resolved.
This airlock was different. Much of it was designed in place, one problem at a time.
That made the process slower, but it also became part of what I wanted the project to demonstrate to my children. You can begin without knowing exactly how you will finish. You can make a mistake, cut apart something you thought was complete, and build it back better. Most importantly, you can keep returning to a project (even across seven busy years) until the thing in your imagination becomes real.
Perseverance is not always dramatic. Sometimes it looks like a half-finished science-fiction doorway waiting patiently in the basement while you go be a dad.
Then, when the time is right, you pick up the tools and solve the next problem.
Up Next
At this point, the airlock finally had most of its physical form—but it was still plainly a collection of carved insulation foam.
In the next installment, we’ll begin transforming that foam into something that looks like it belongs on a spacecraft. That means filling, coating, priming and painting the surface before adding the graphics and active components that bring the airlock to life.
Recent Comments